
As Amazon continues to grow, opportunities to build an e-commerce business by selling on the site grow as well.
In 2023, 63% of consumers started their shopping searches on Amazon, with low product prices, free or low-cost shipping, and convenience as the reasons they chose to shop online instead of in-store. More than half of consumers shopped on Amazon weekly or more, and towards the end of the year, 67% of consumers chose to shop on Amazon for holiday gifts.
These trends indicate that the year ahead holds immense potential for ecommerce entrepreneurs in 2024. However, if you want to take advantage of the enormous opportunity Amazon represents, you must first go through the Amazon seller registration process.
So, to make sure your Amazon seller account is verified (giving you the chance to build a successful business), we’ll walk you through the updated Amazon seller registration process.
Want to learn more about selling on Amazon? Check out our complete guide.
How to start an Amazon business
What’s great about Amazon is that there isn’t just one way to start an Amazon business. From the business model you choose to the products you decide to sell, there are many ways to succeed on the platform.
However, the steps required to get up and running on Amazon remain the same, regardless of the type of business model and the product you choose.
1. Decide which business model you want to use
- Private Label: Private label is the process of a retailer rebranding/renaming a product that is already being manufactured on their own brand or label.
- Wholesale: Wholesaling is the practice of purchasing low-cost or discounted goods in bulk in order to sell as individual units in a retail marketplace.
- Online and/or Retail Arbitrage: Arbitrage is a method of finding low-cost or discount goods in brick-and-mortar retail stores (or on e-commerce sites) in order to resell them online.
- Dropshipping: Dropshipping is a business model where an Amazon seller does not keep their own product inventory, but instead transfers their customers’ orders directly to the manufacturer or supplier.
- Handmade: Amazon’s handmade sellers are people who create their own products (“by hand”) to sell on the Amazon marketplace. Examples include jewelry, accessories, home decor, and more.
2. Choose which fulfillment method you’ll use
- Fulfillment by Amazon (FBA)
- Fulfillment by Merchant (FBM)
There are pros and cons for both methods, so make sure you look closely at both to determine which one will work best for your business. You don’t have to choose one or the other, though. You can fulfill orders with both FBM and FBA.
3. Consider the product(s) you’re going to sell
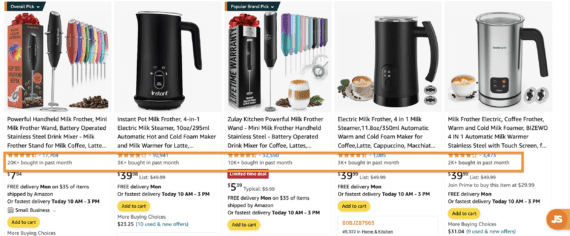
If you have a product, you may be ready to go, but you should still follow this step to validate that your product will have sufficient demand on Amazon.
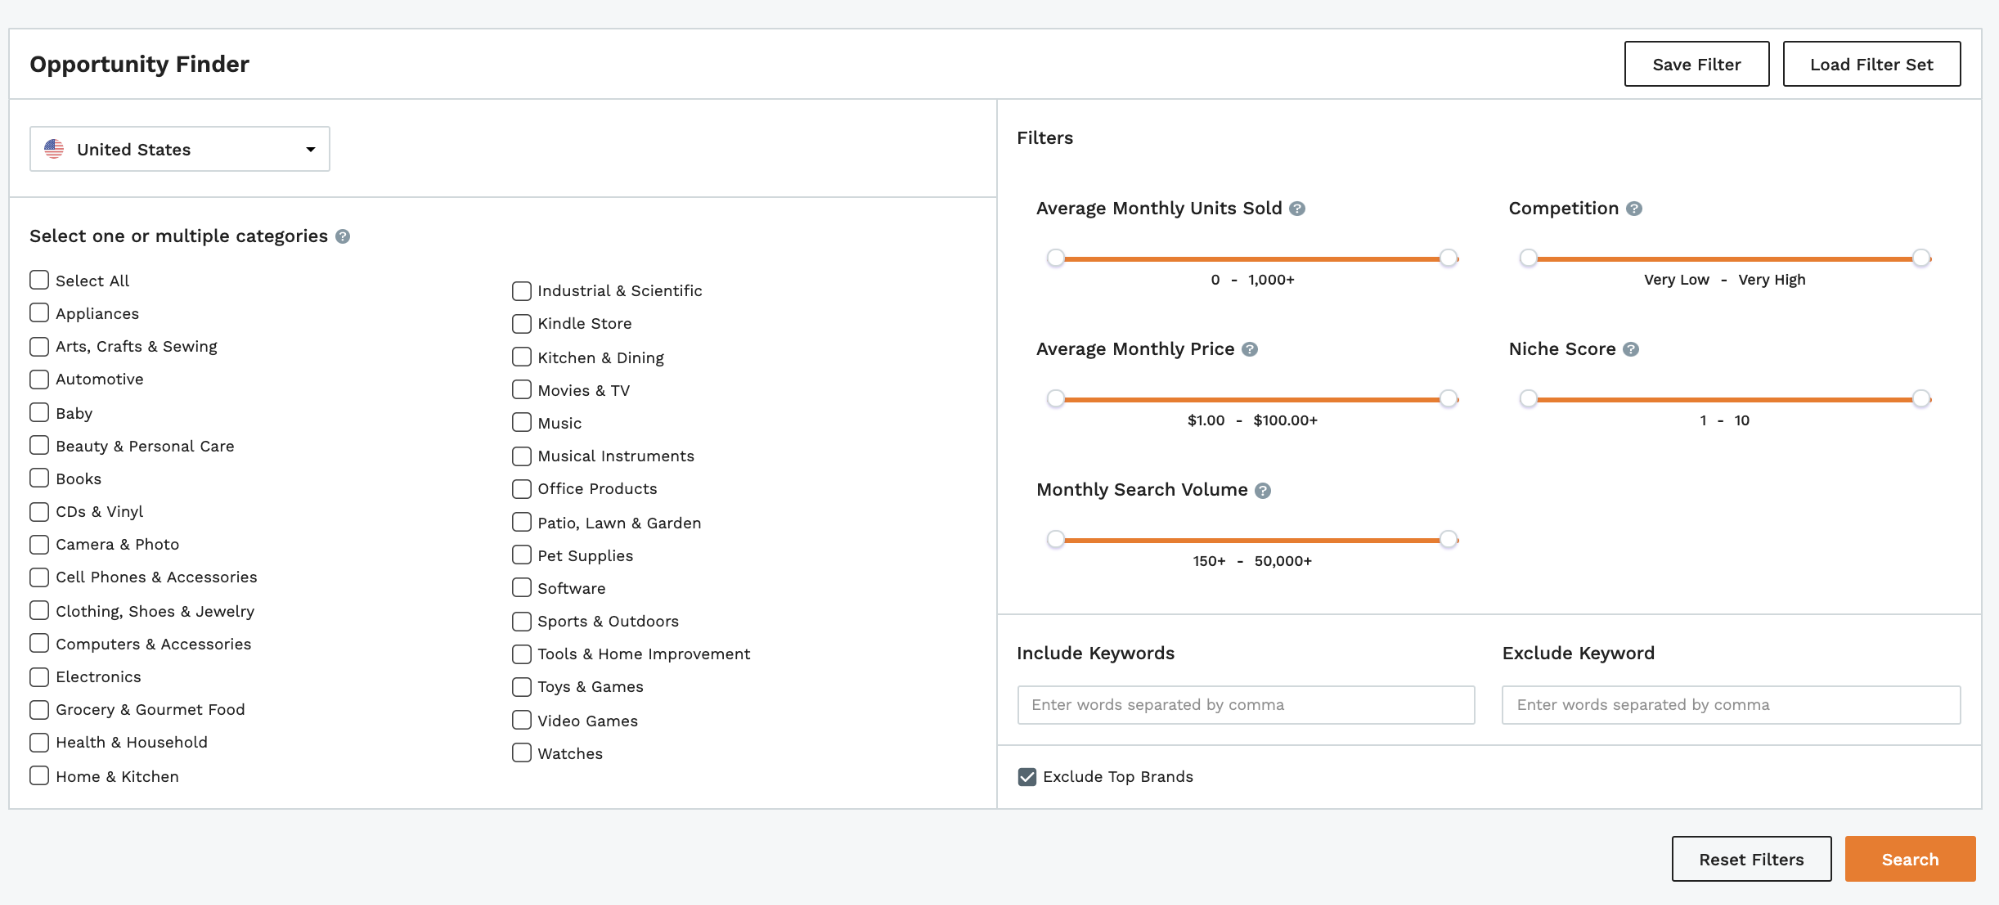
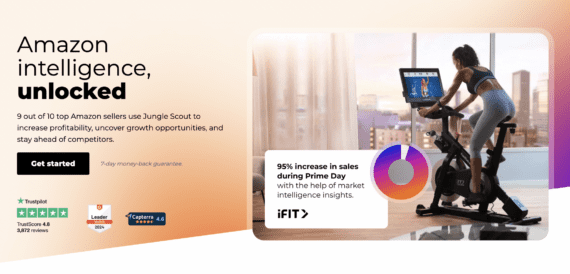
To help you find products to sell that are high in demand, but low in competition, make sure you use a tool like Jungle Scout.
Learn more about how you can use Jungle Scout to launch, grow, and run your Amazon business.
4. Apply to become an Amazon seller
More details on how to complete the Amazon seller registration process are in the next section.
5. Start sourcing your product(s)
If you’ve chosen to sell private label, you can find a manufacturer to create your product by using Jungle Scout’s Supplier Database or Alibaba.
6. Create your product listing
And once you create your listing, you can grow your Amazon sales from there! We recommend using a tool like Jungle Scout’s Listing Builder, where you can leverage AI to help write a compelling listing in seconds.

How to create an Amazon seller account
Once you’ve figured out what you plan on selling on Amazon, you’ll need to go through the Amazon seller registration process, which is really quite simple.
1. Go to https://sell.amazon.com
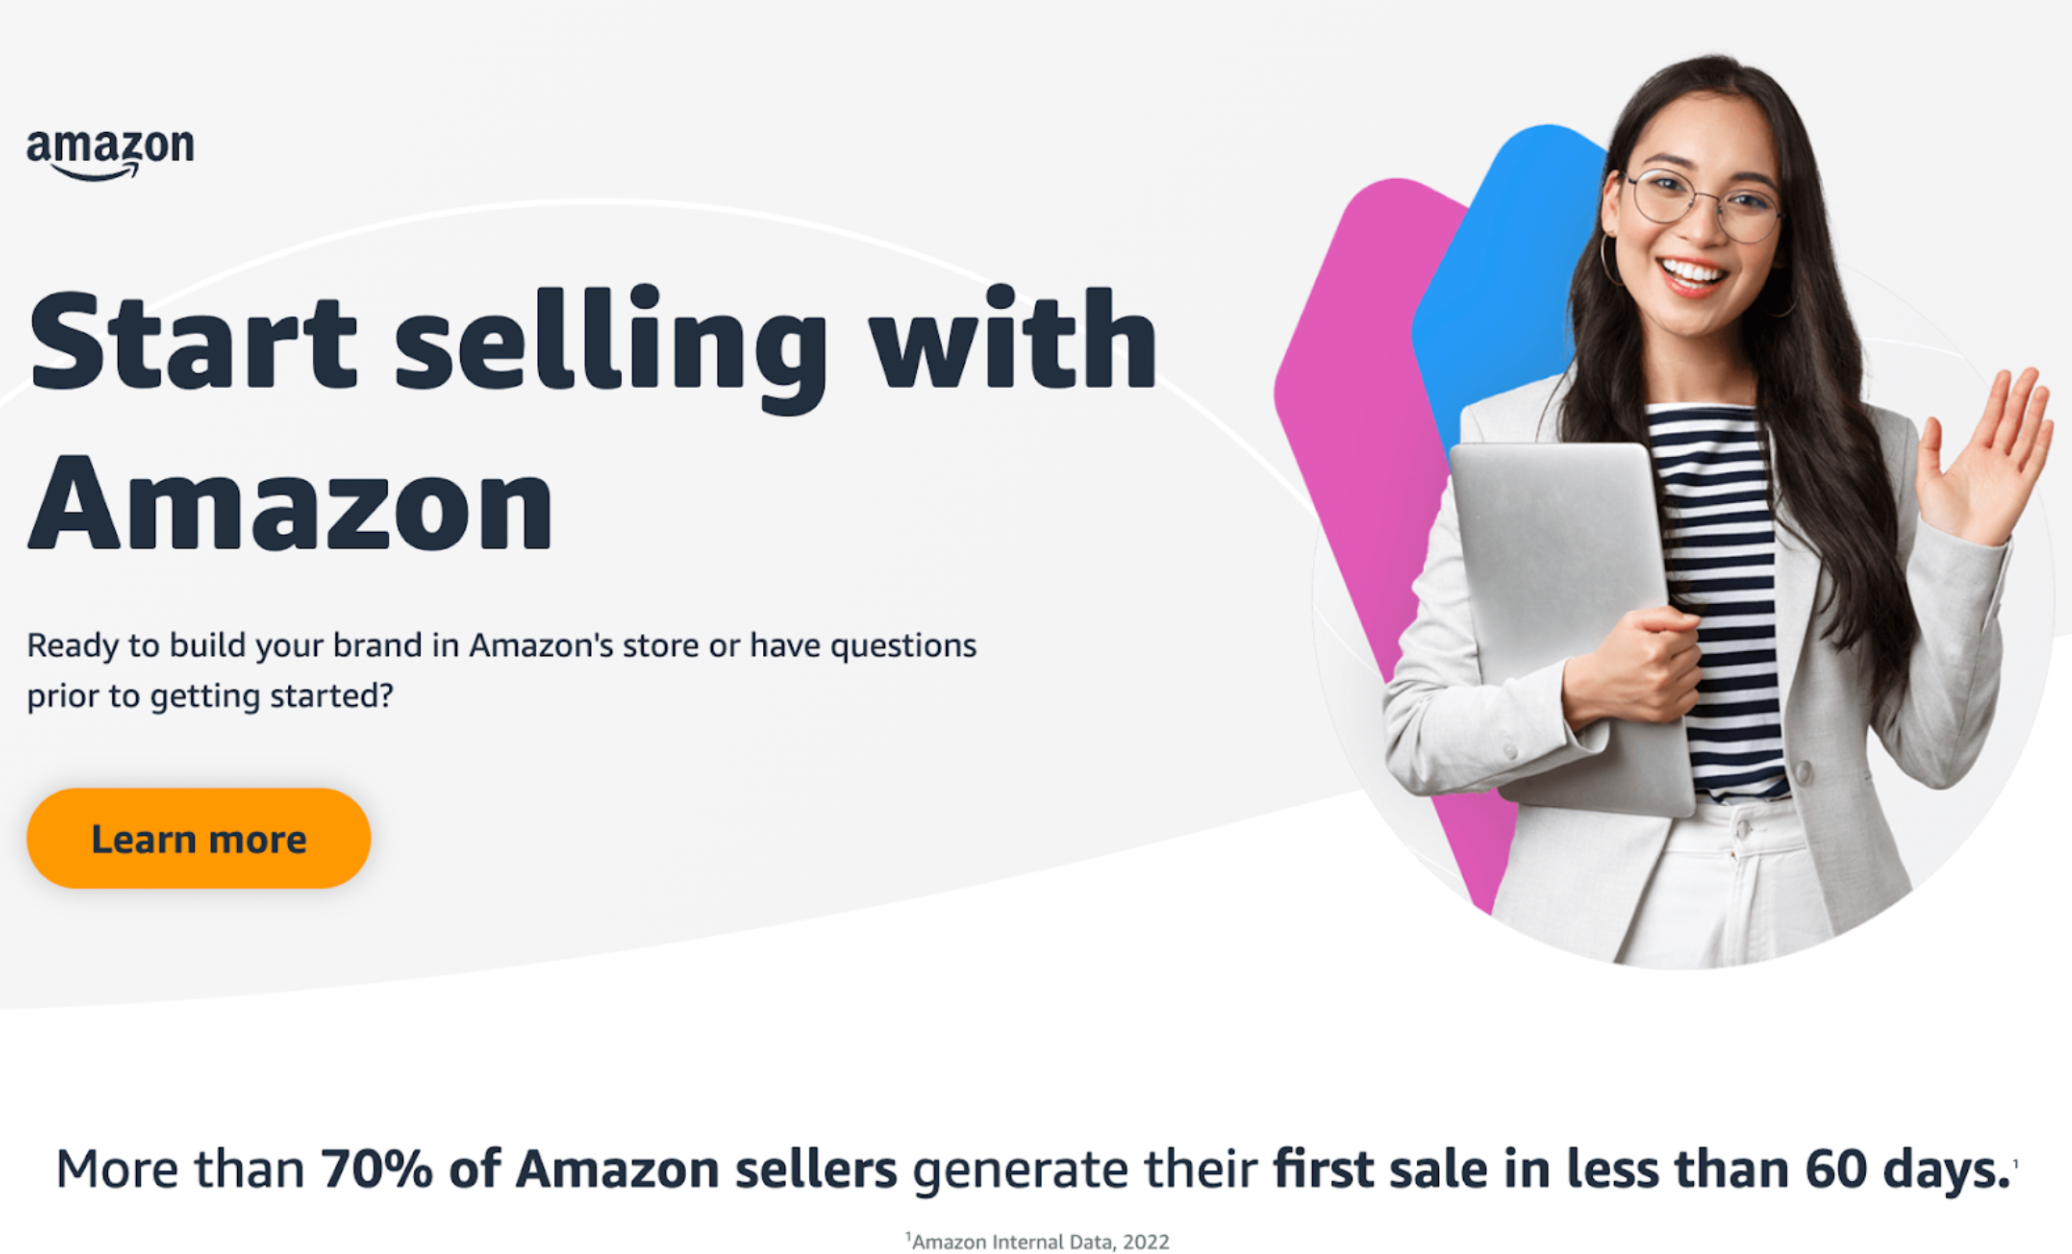
2. Click on the “Learn more” button
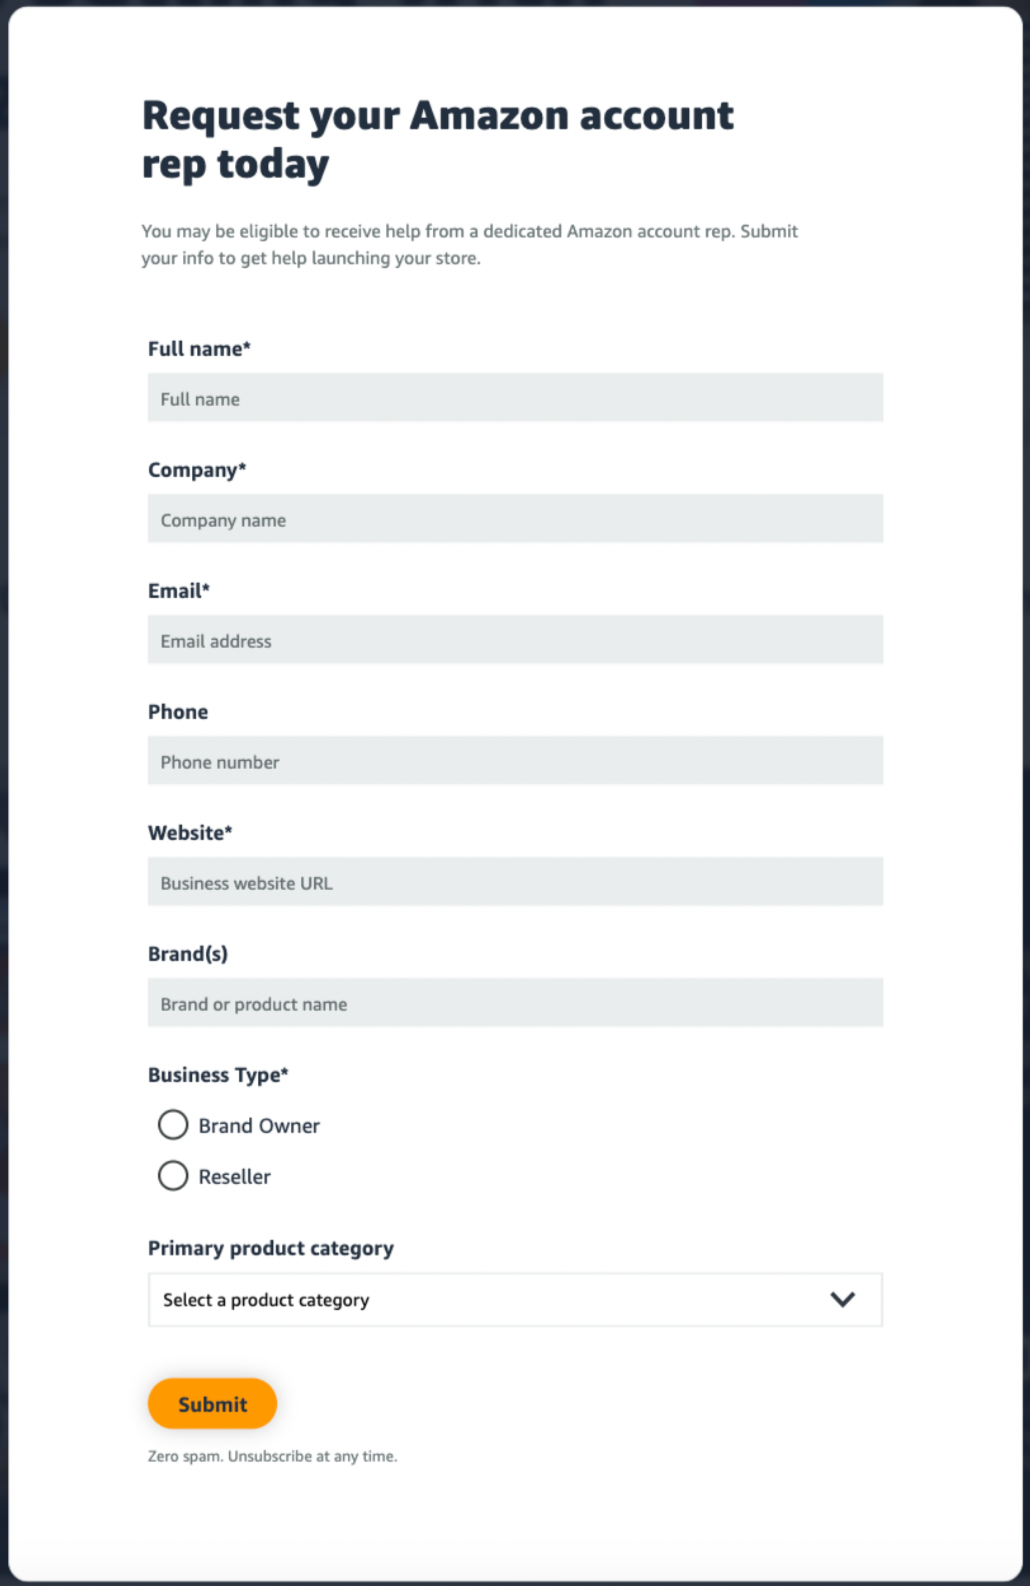
Next, fill out the form with your information. Based on what you submit, your business may be eligible for a dedicated Amazon account rep. If you don’t have a business website, you can put “Amazon.com” in that field. Once you submit your information, you’ll be sent to a confirmation screen.
3. Wait for an email from Amazon or sign up immediately
In this step, you can either wait to receive an email from an Amazon account representative, or sign up to start selling right away. We assume you are eager to get started, so click on Sign up!

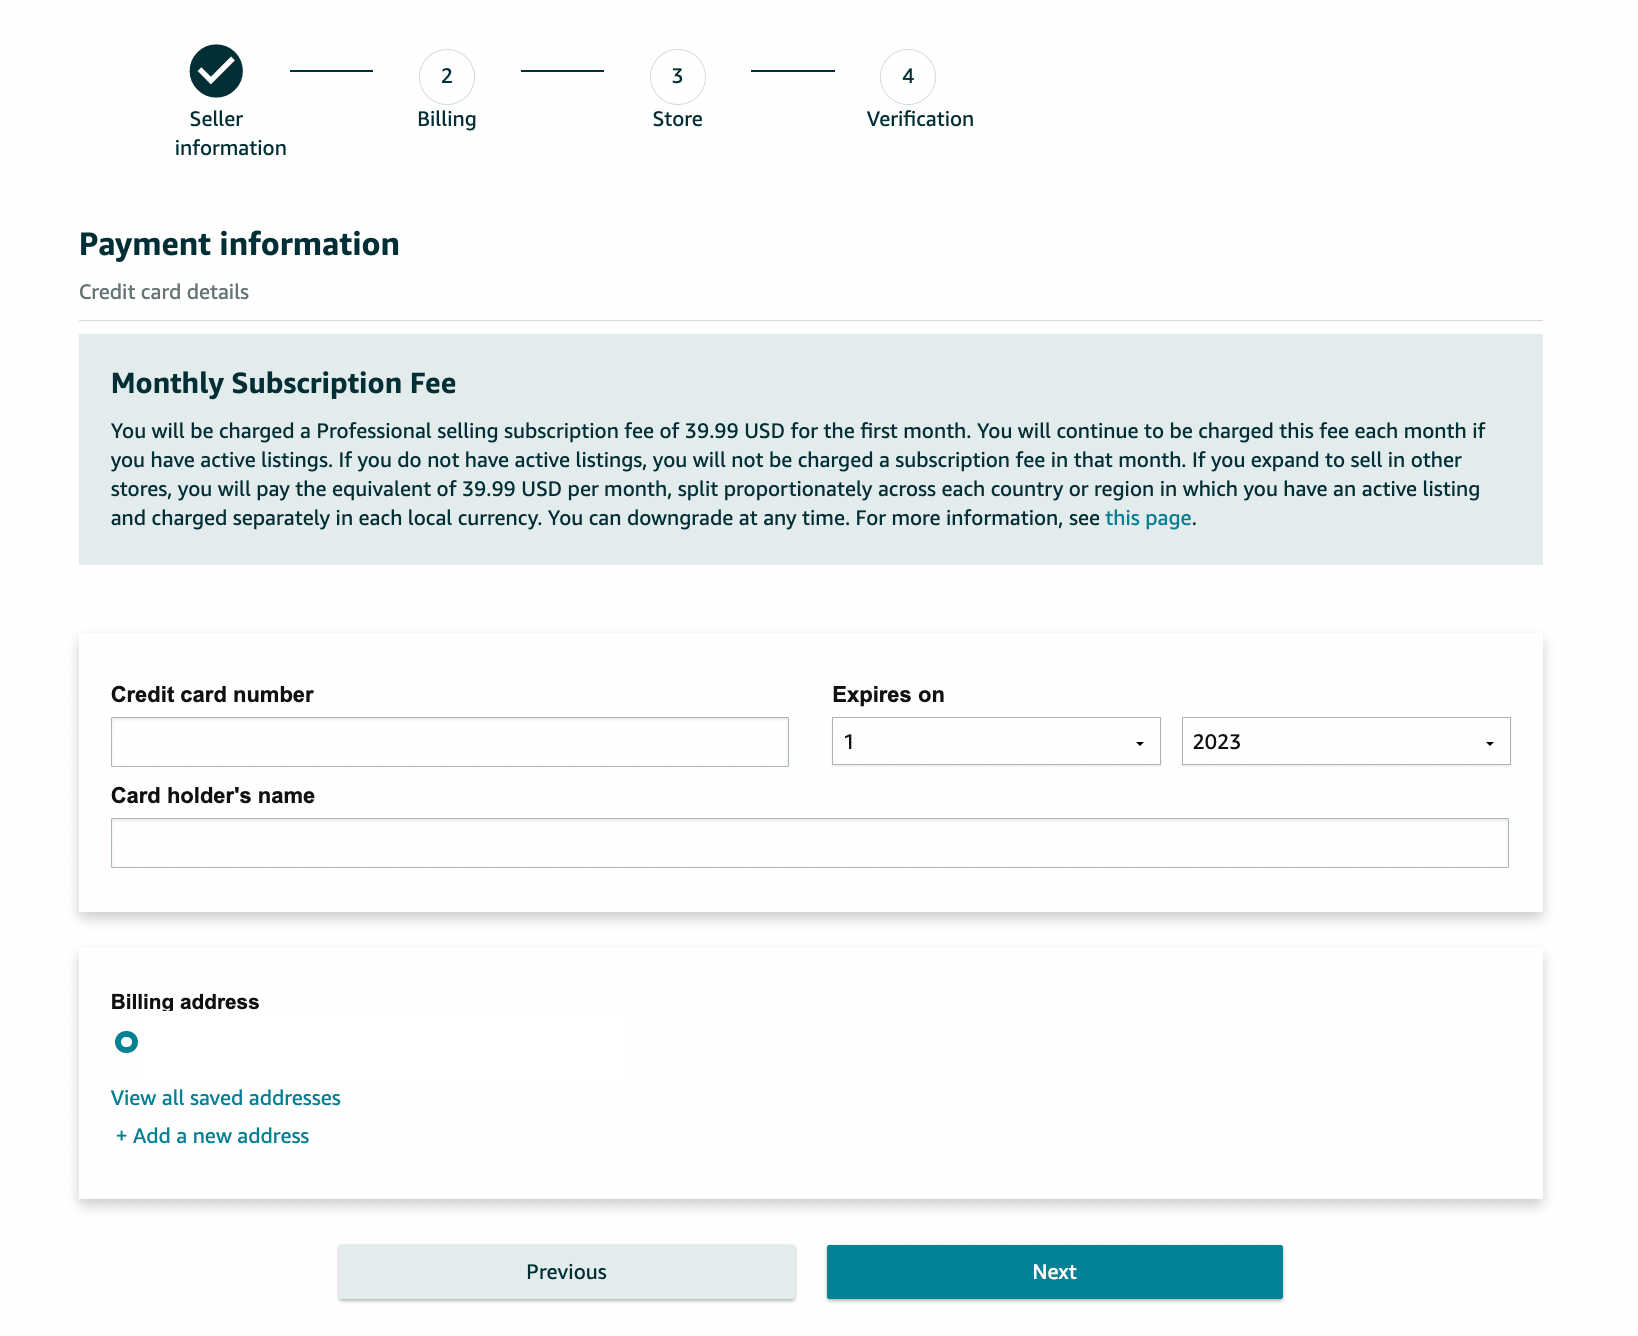
Note: When you sign up for the professional Amazon seller account, you will be charged $39.99/month for the first month. For any months that you do not have any active listings, you will not be charged the $39.99 for that month. Once you have an active product for sale, you will be charged again. You can downgrade to an individual seller account at any time.
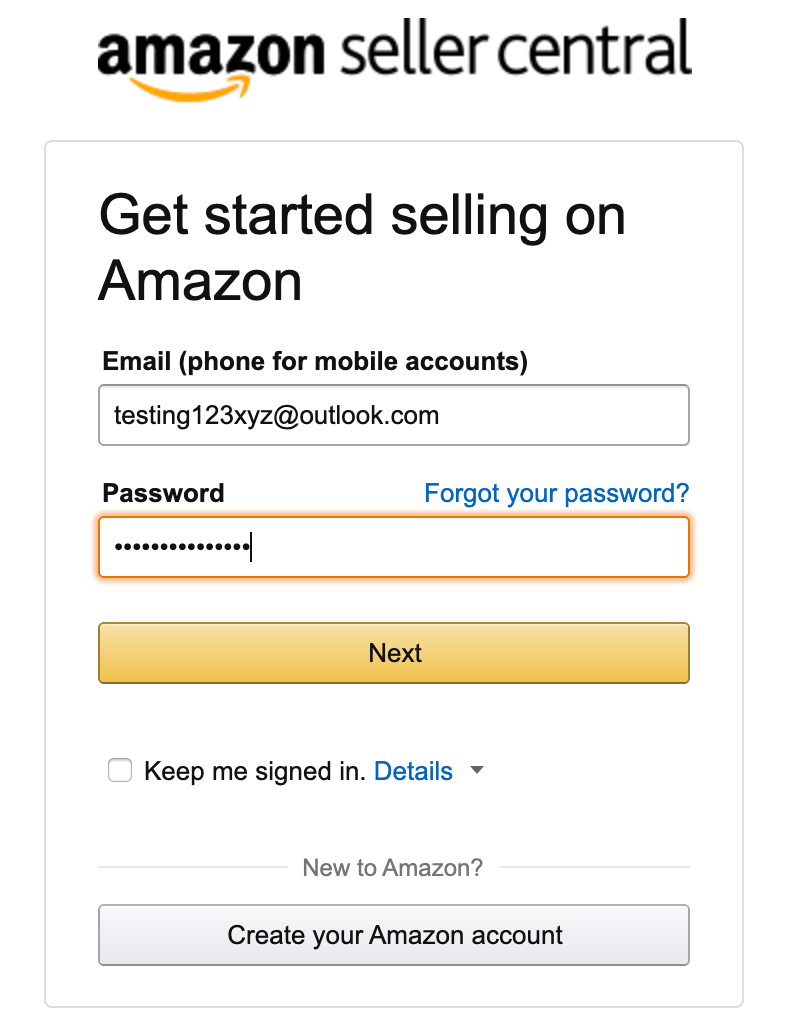
4. Enter your email and select ‘Create a New Account’
Once you’ve chosen the seller plan that is right for you, the following window will appear where you’ll be asked to enter your email address and a password (of your choosing) for your seller account.
When you’re done, click the ‘Create your Amazon account’ button.
This will take you to a second screen stating you must enter a verification code sent to your email. This is Amazon’s way of verifying the email you entered.
Once you enter the correct code, you’ll be automatically taken to this screen:
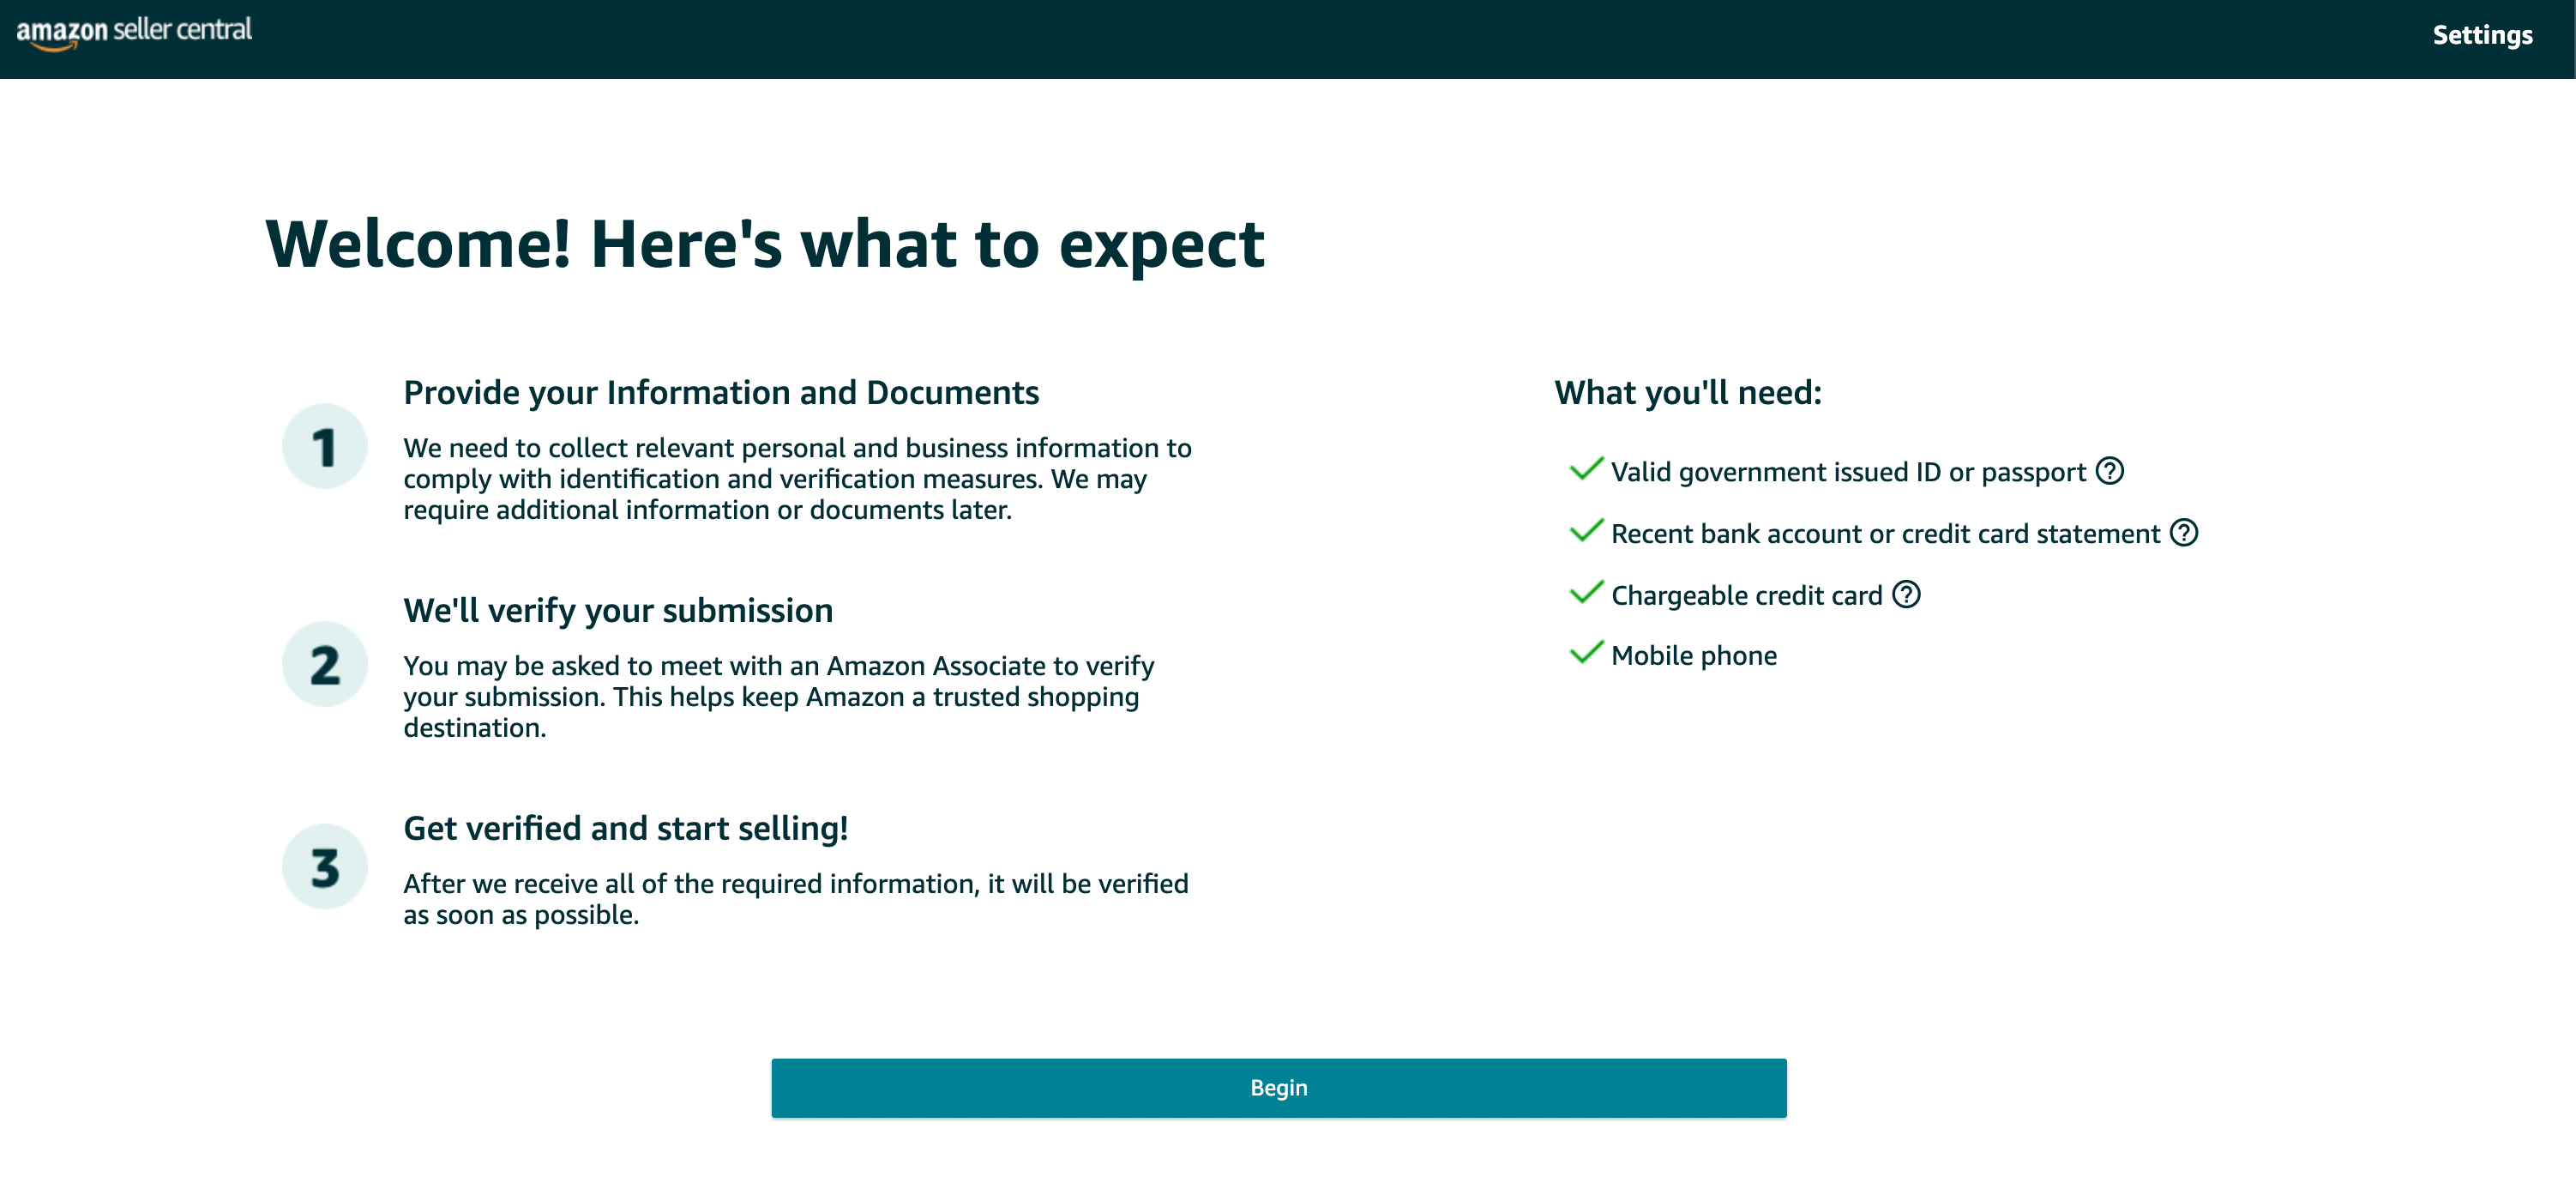
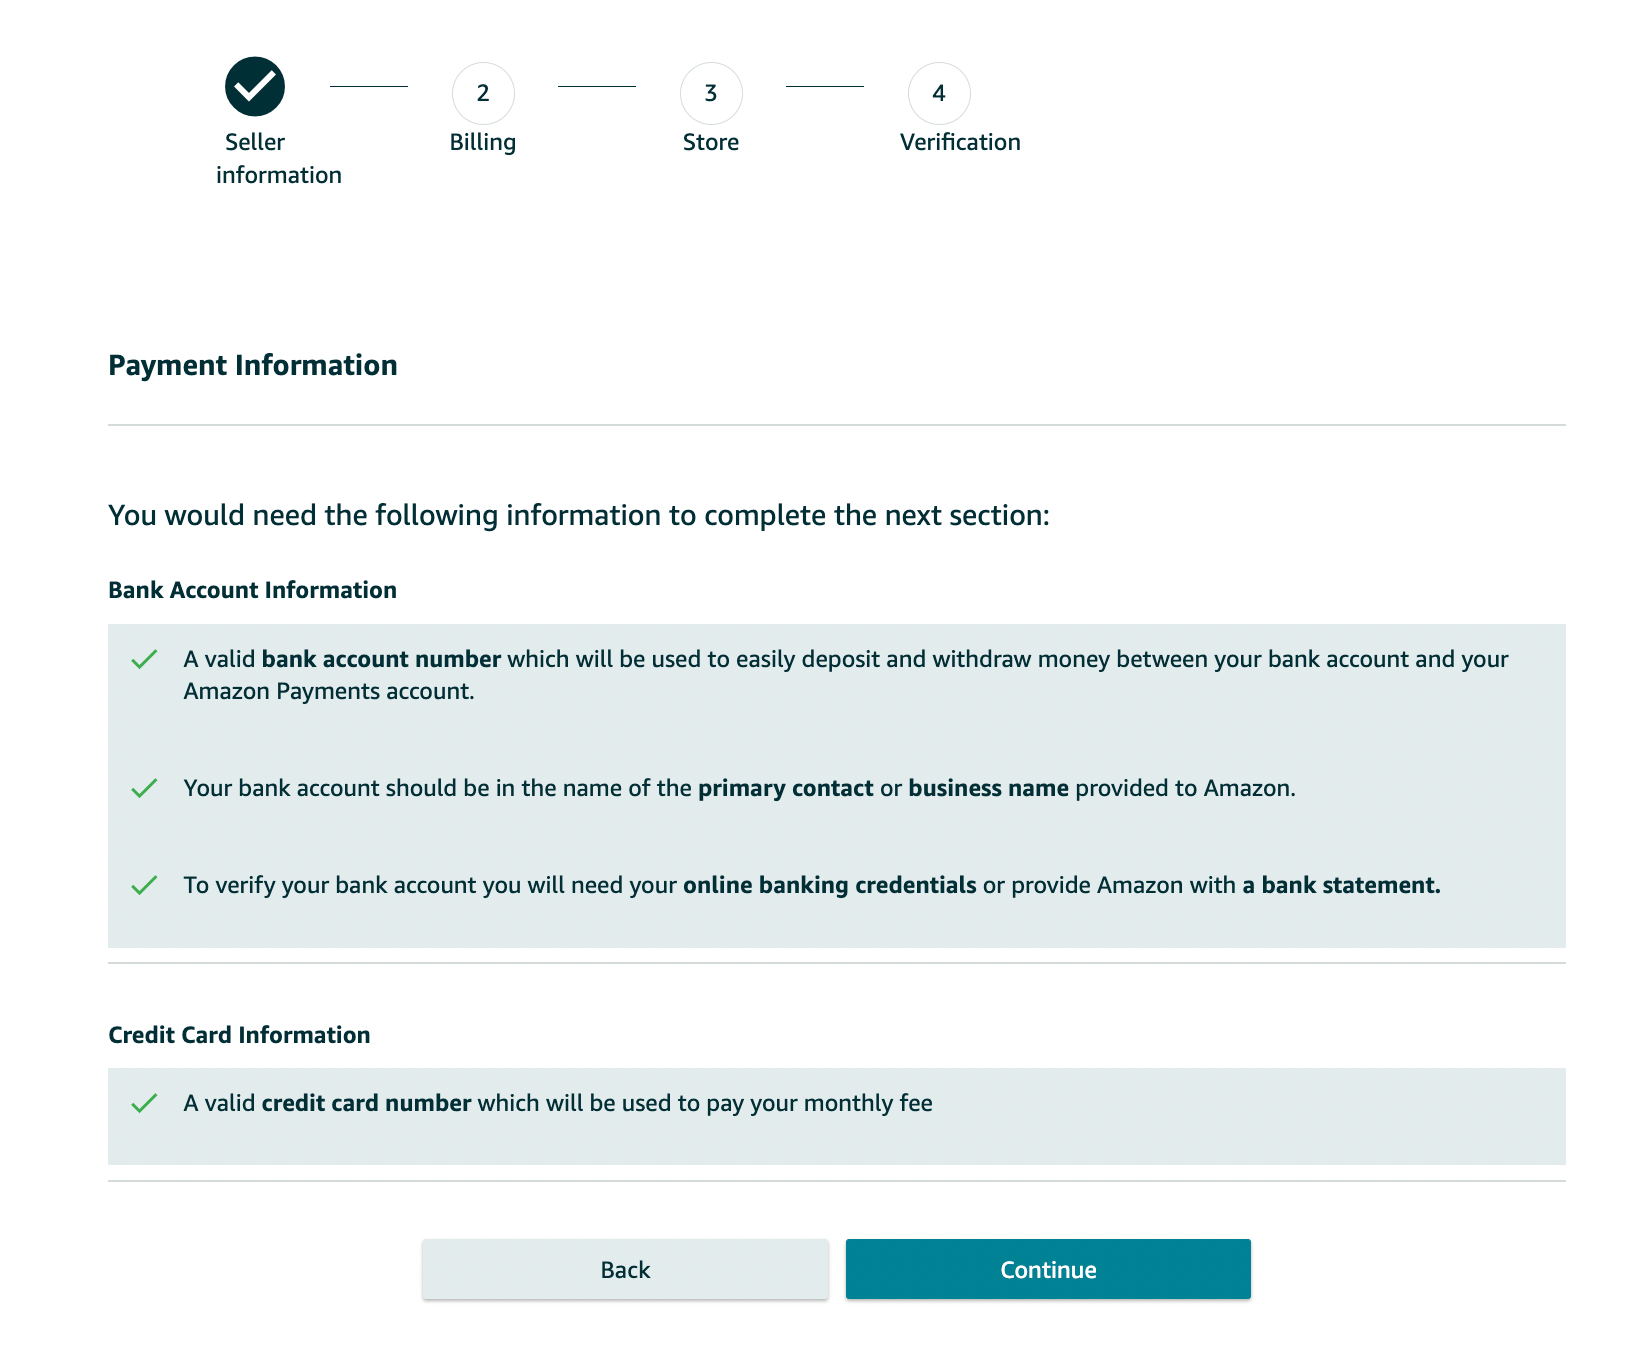
Amazon will let you know what you’ll need to complete your registration:
- Valid government issued ID or passport
- Recent bank account or credit card statement
- Chargeable credit card
- Mobile phone
5. Choose your ‘Business location’ and ‘Business type’
The next step in the Amazon seller registration process is to share the following information:
- Your business location: This is the country in which your business is located. It’s extremely important that this is accurate, as Amazon will be verifying it (see step 10).
- Your business type: You’ll be able to choose your business entity from the following options (most fall into the ‘Privately-owned’ category):
- State-owned business
- Publicly-owned business
- Privately-owned business
- Charity
- None, I am an individual
If you don’t have a business formed just yet, choose “None, I am an individual.” If you choose this, Amazon will ask for your full name in the next step.
- Your full name: Make sure you enter your first, middle, and last name.
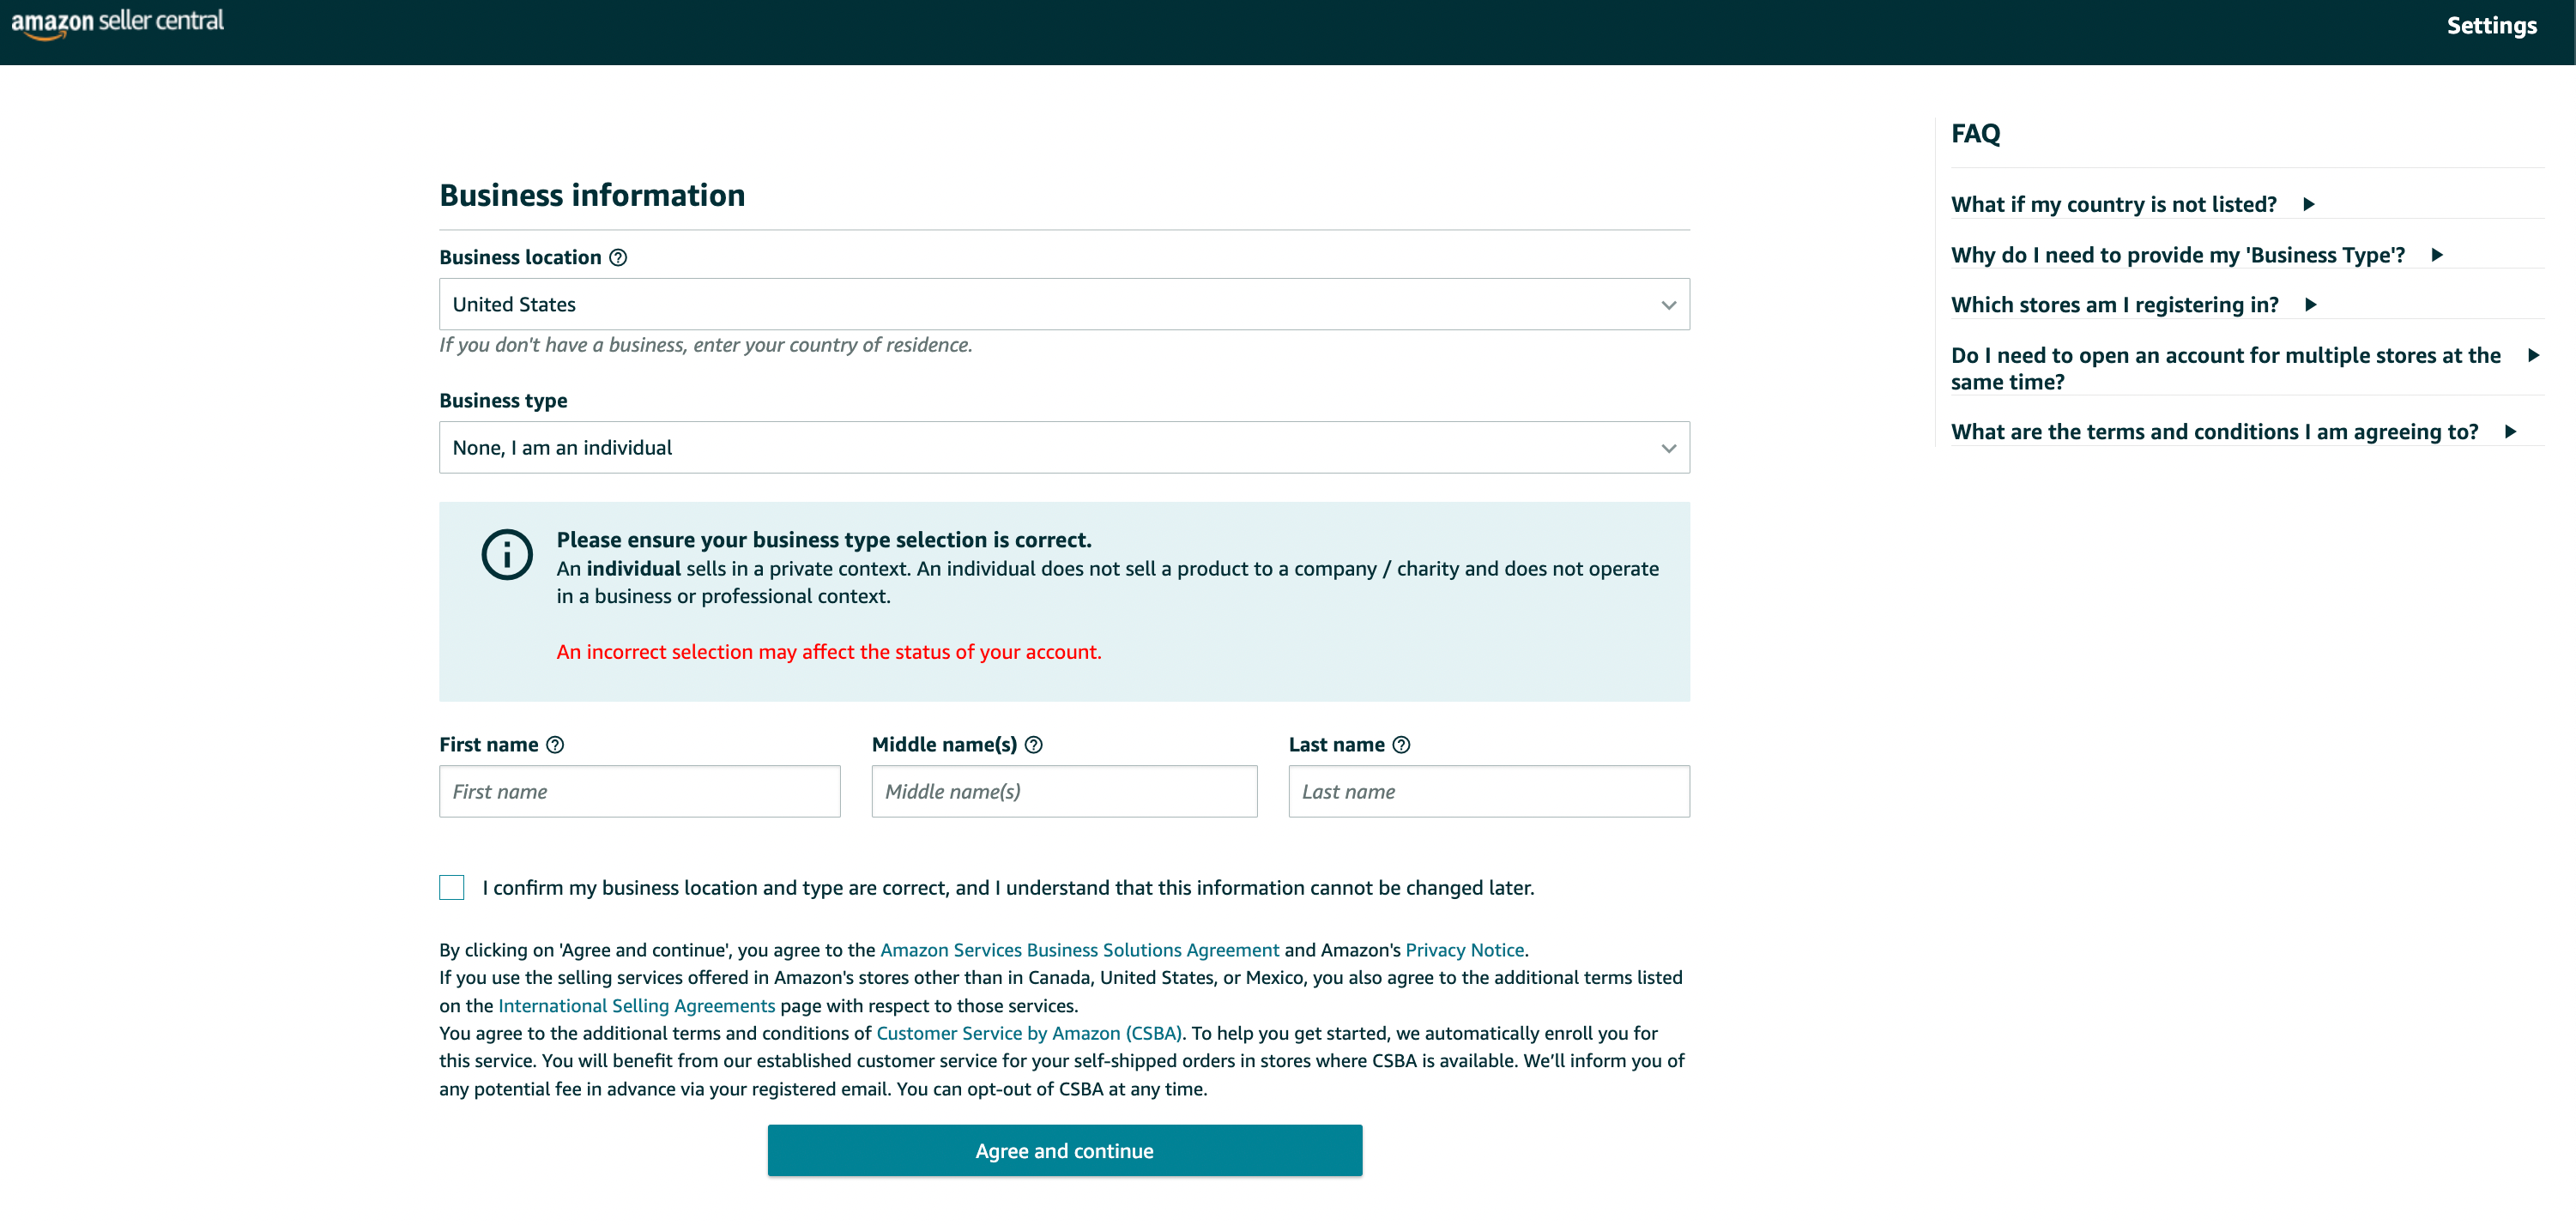
Then, click the ‘Agree and continue’ button.
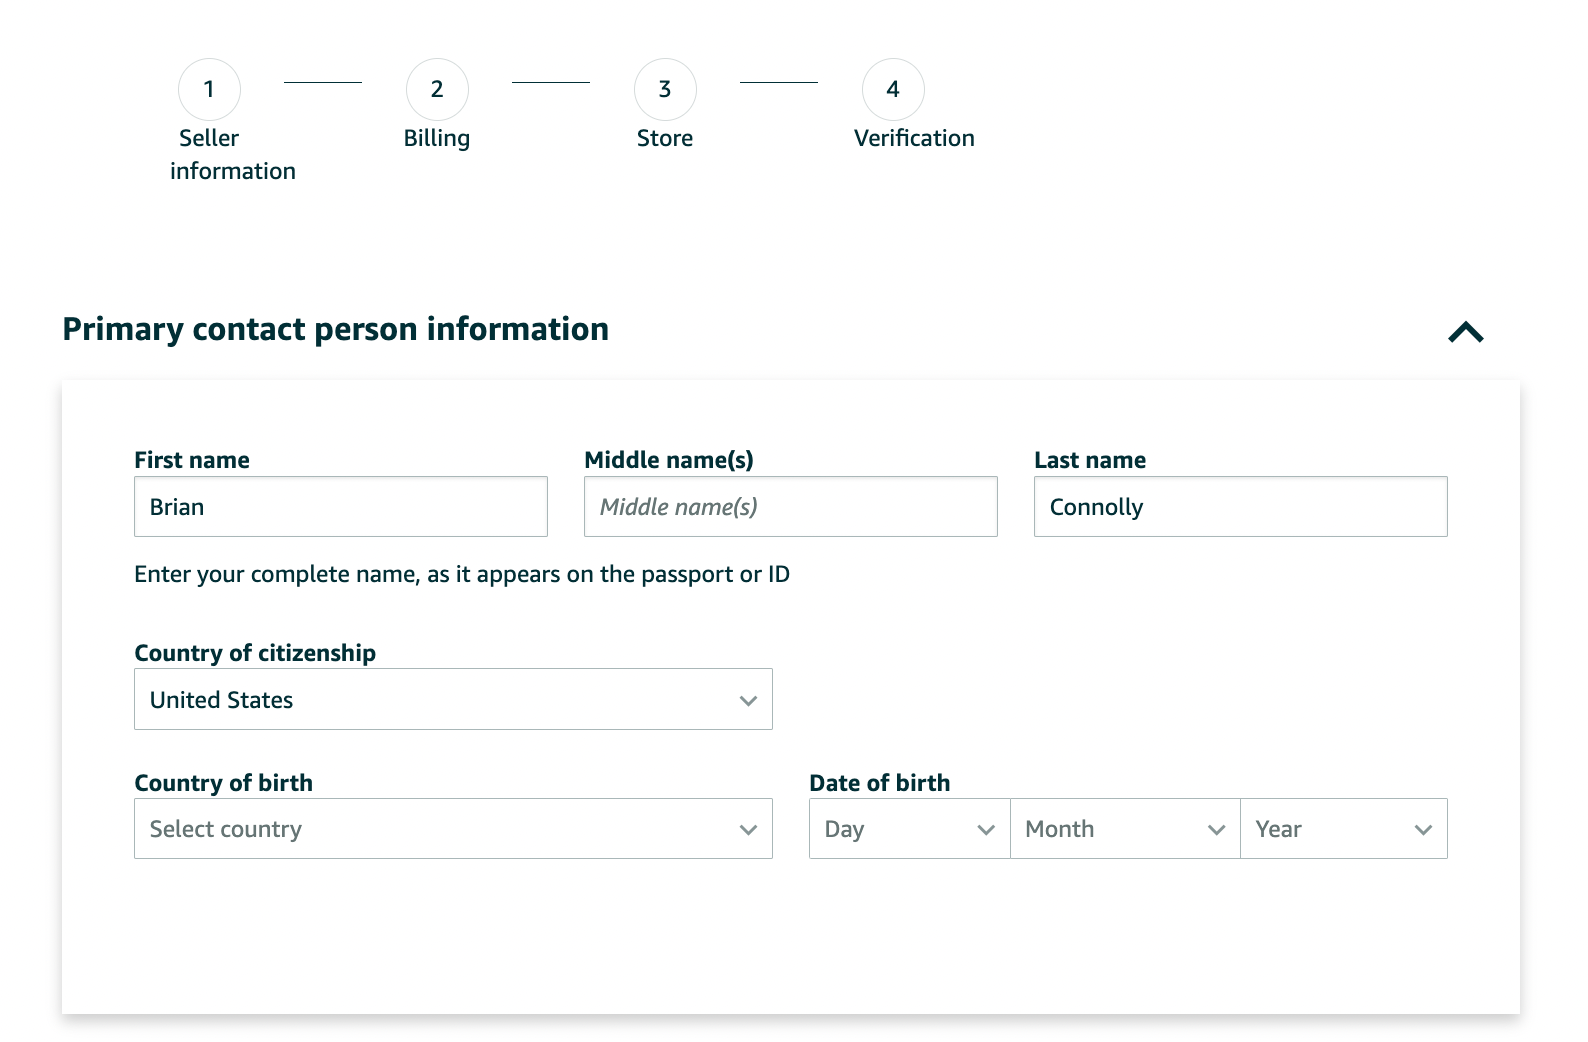
6. Enter your personal information
From there, you’ll be asked to provide Amazon with a number of personal details. This includes a form of identification (either your passport number or your driver’s license).
To move onto the next step, you will need to verify your phone number through a text or call. When you enter the PIN you received from Amazon, your number will be verified.
Make sure all of your information is correct before moving on.
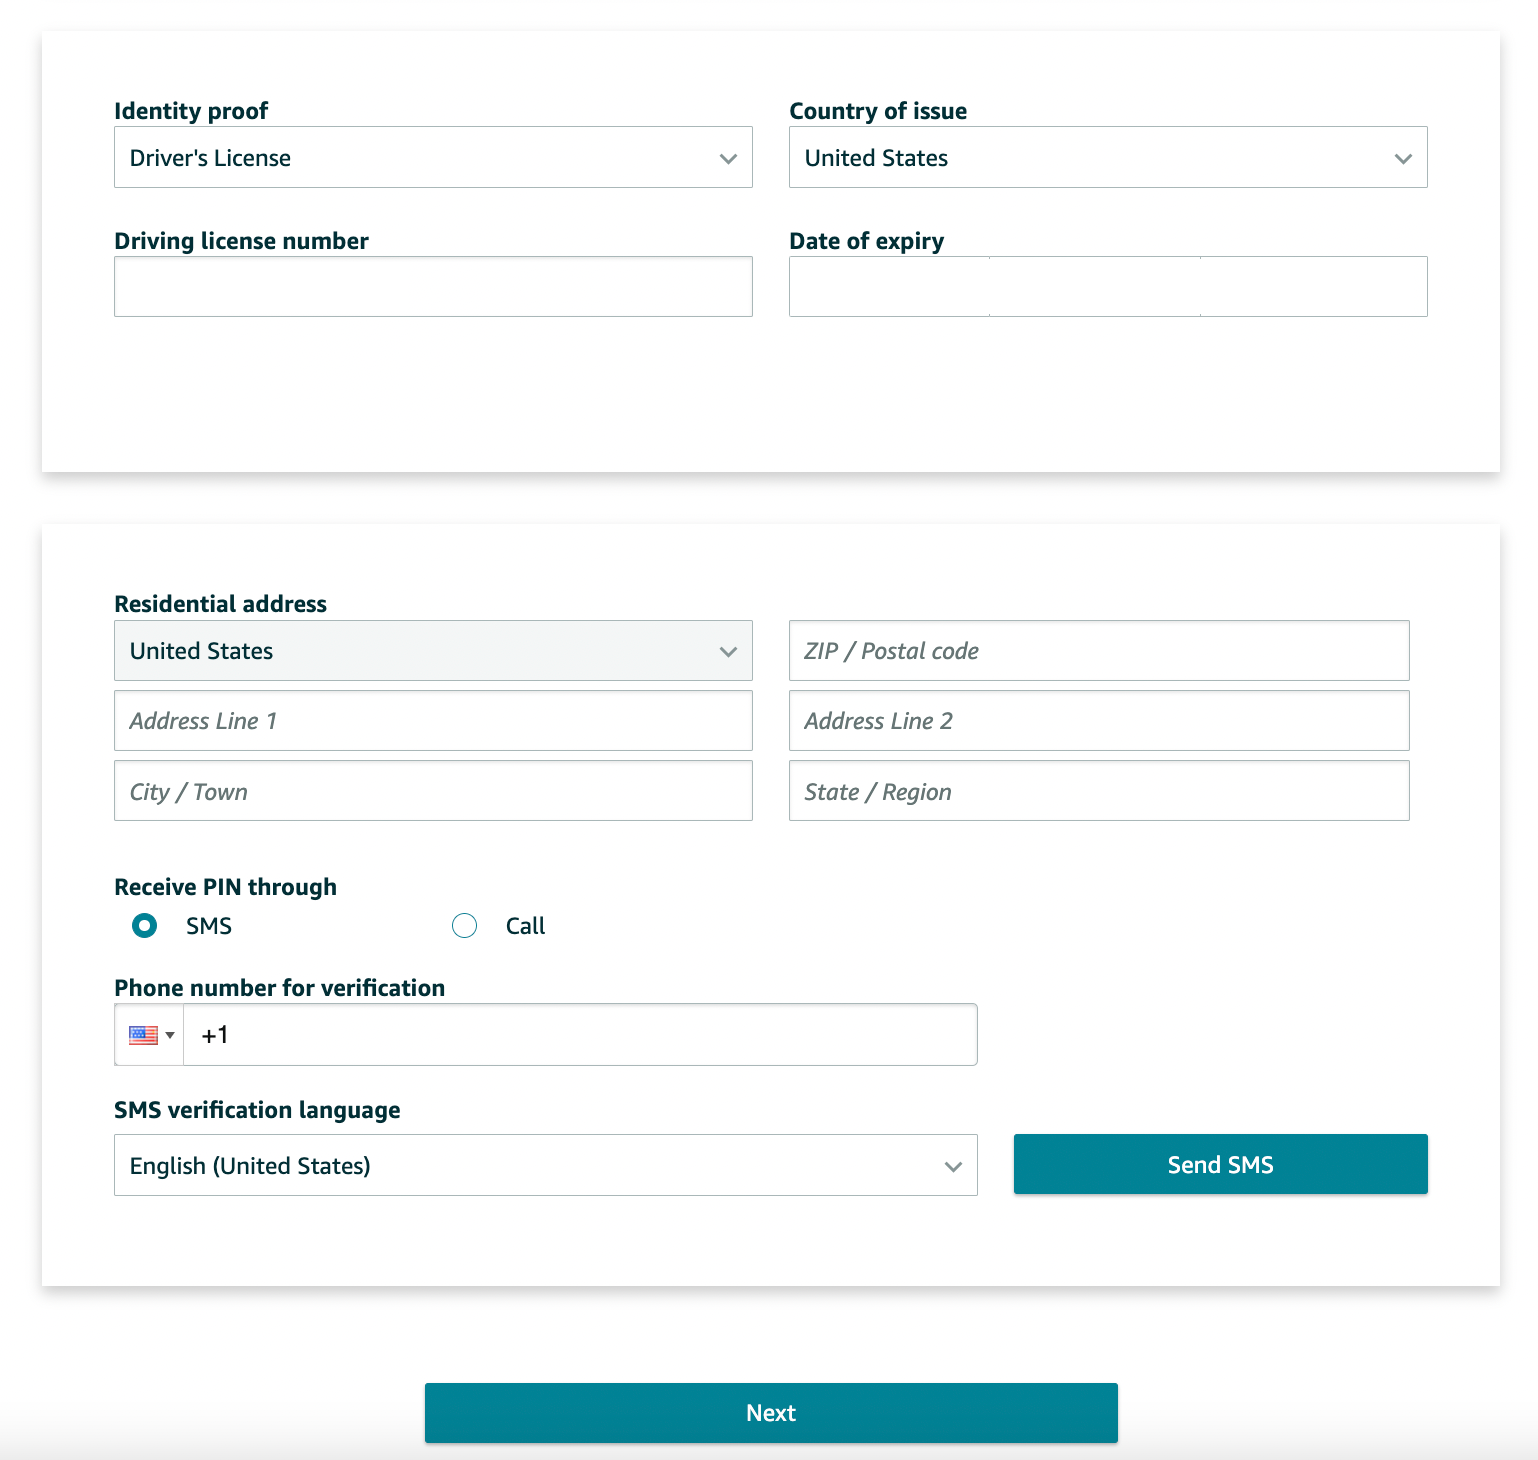
When you’ve entered everything, click on ‘Next’ at the bottom of the screen.
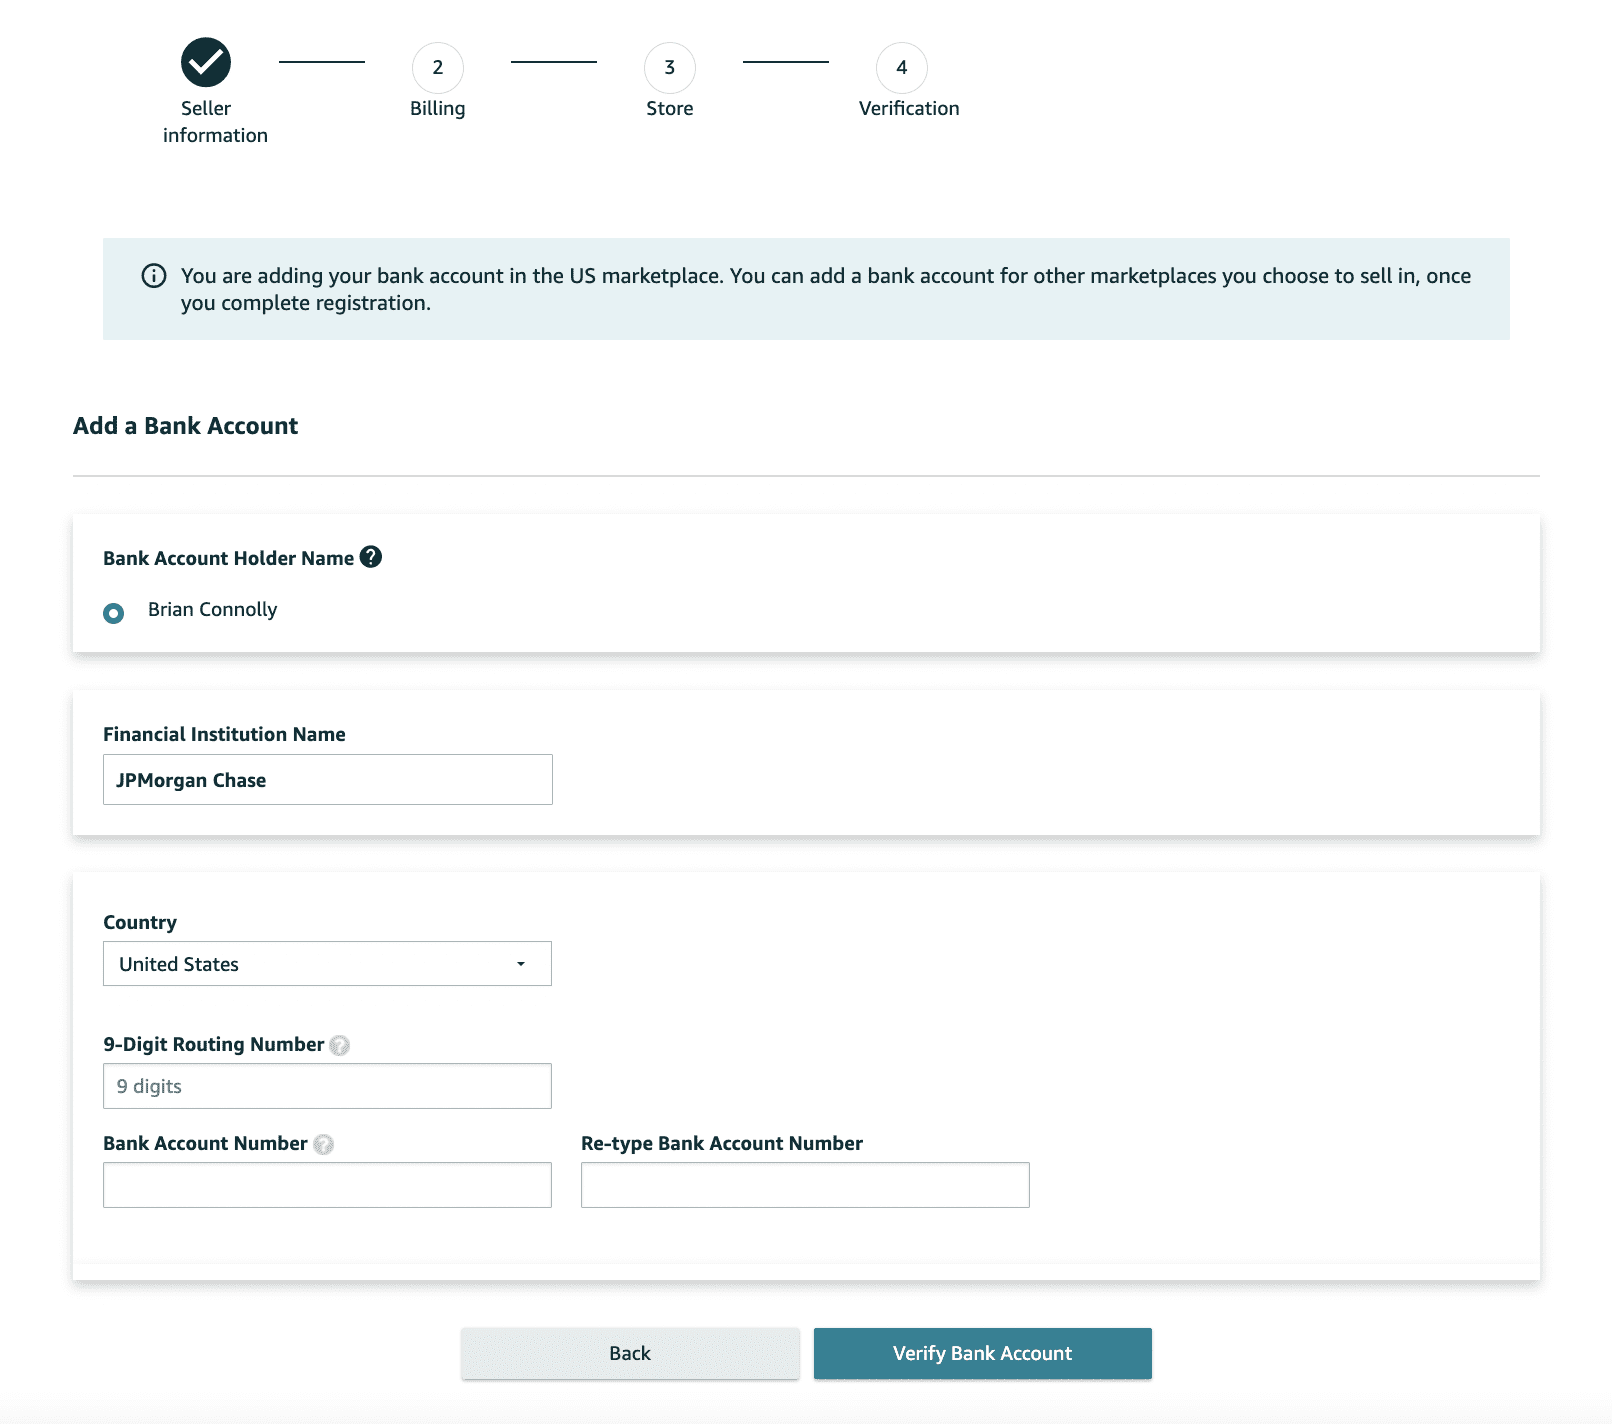
7. Enter your billing information
Your next step will be to provide Amazon with your billing information. This includes a valid bank account number and a valid credit card number.
8. Add the information for your product(s) and Amazon store
After you supply your credit card information and it has been validated, you’ll be asked a few questions about your Amazon store and the products you plan to sell.
To move onto the next phase of the Amazon seller registration process, you’ll need to answer the following:
- The name of your Amazon store (don’t think too much about this, you can change it in the future)
- Whether or not you have UPC codes for your product(s) (if you’re not sure, just click “Yes”)
- If you have any diversity certifications
- If you are the manufacturer and/or brand owner of the product(s) you’re selling
- If you click ‘Yes’ or ‘Some of them’ you’ll be asked: Do you own a government-registered trademark for the branded products you want to sell on Amazon?
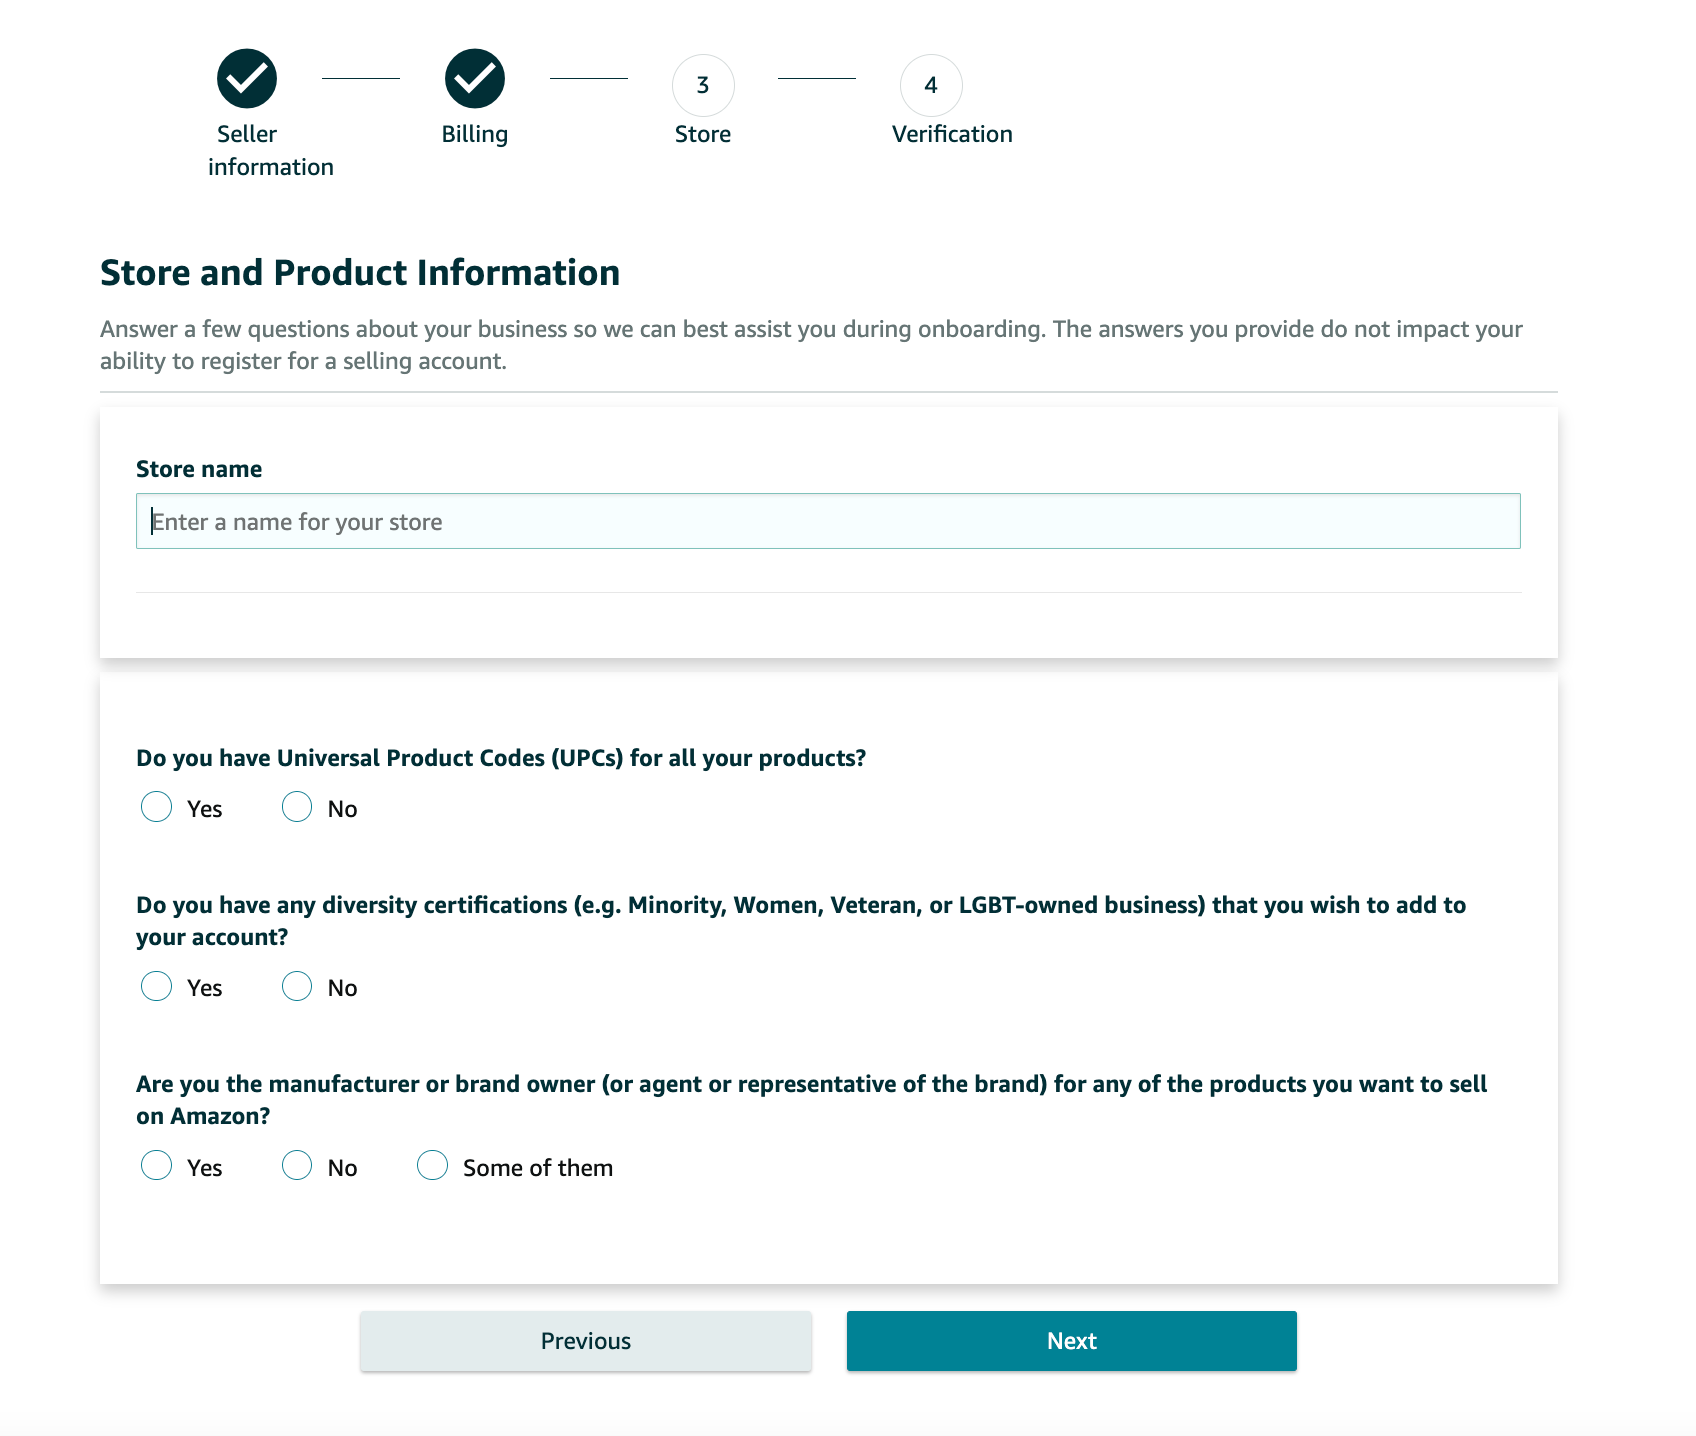
Click the ‘Next’ button after you’ve provided the answers to those questions.
9. Identity verification
Next, you’ll be asked to verify your identity by uploading images of your ID (license or passport) and a bank statement.
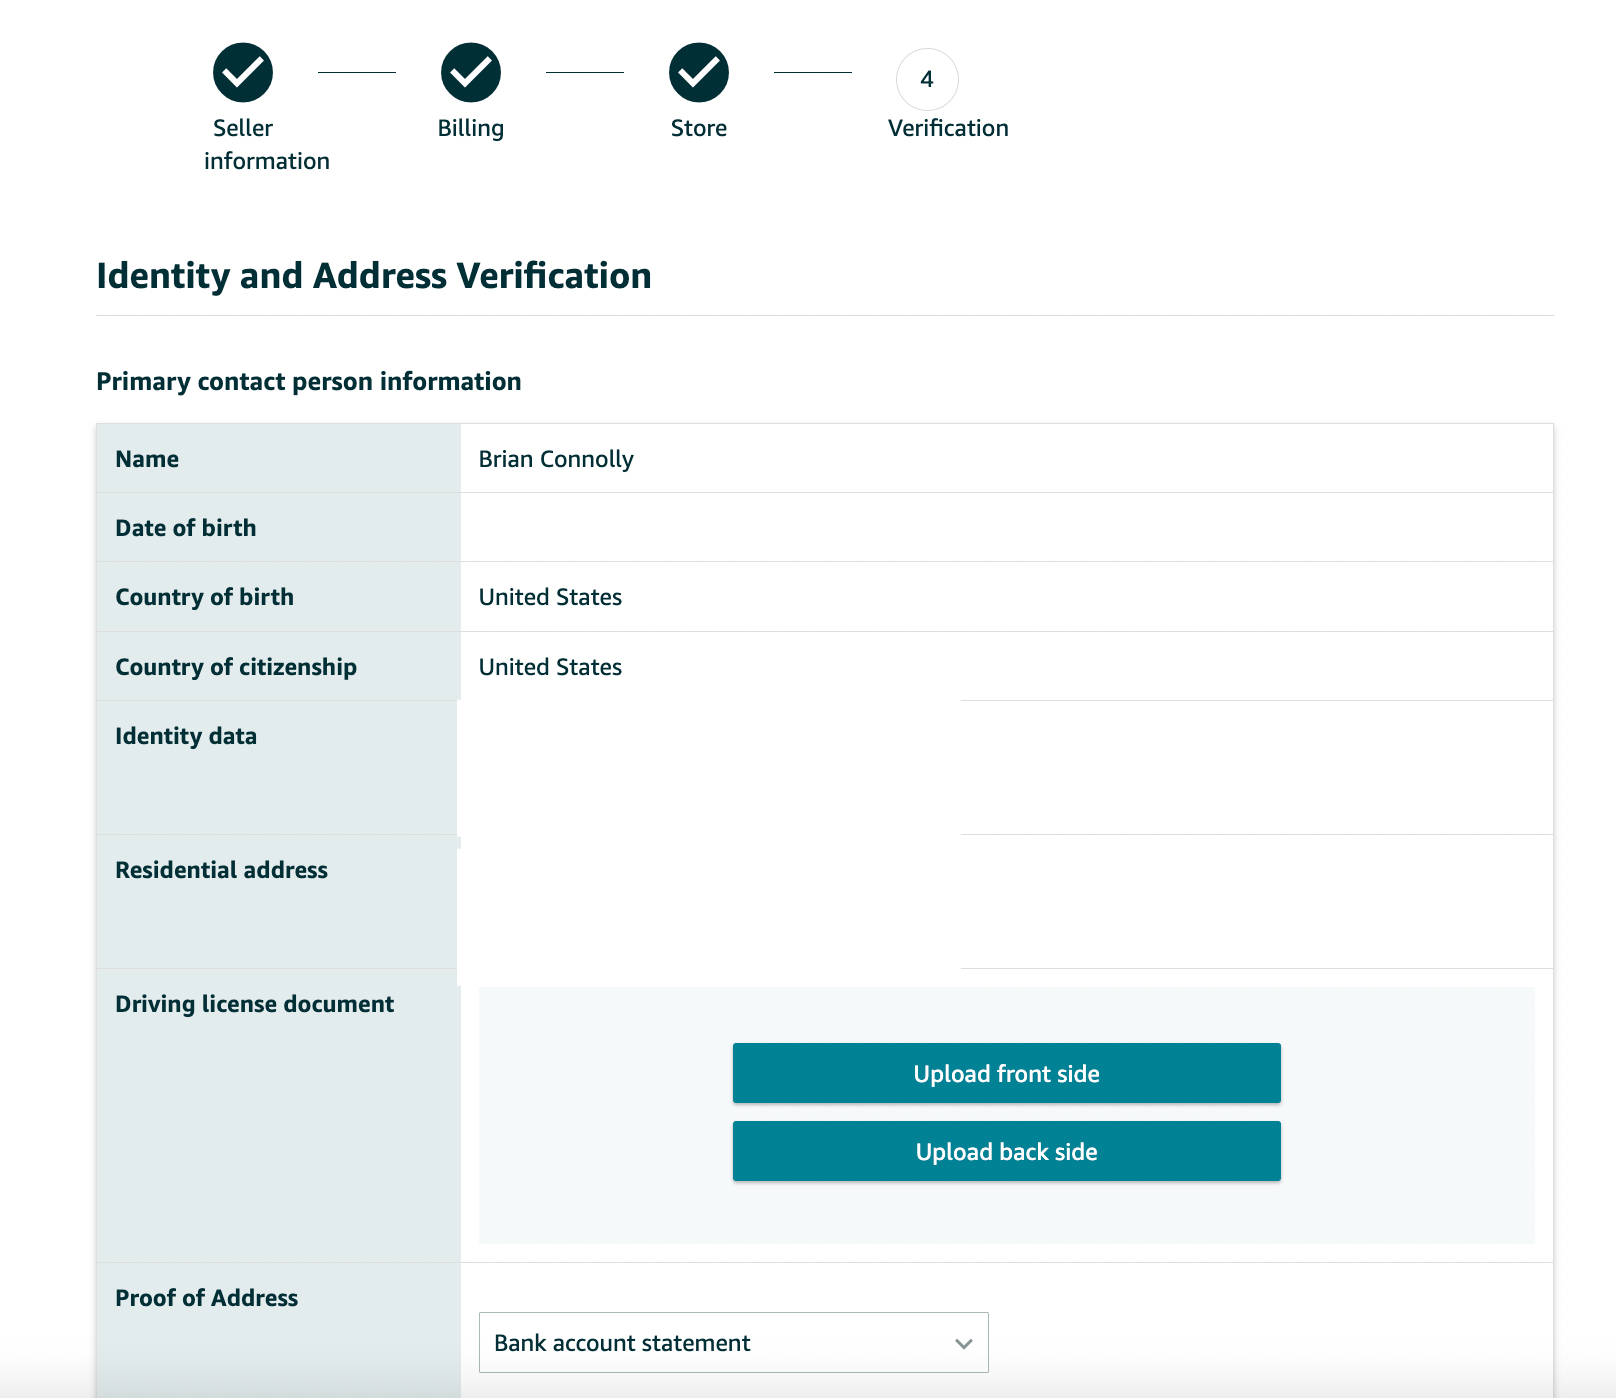
After you upload your documents, click Submit.
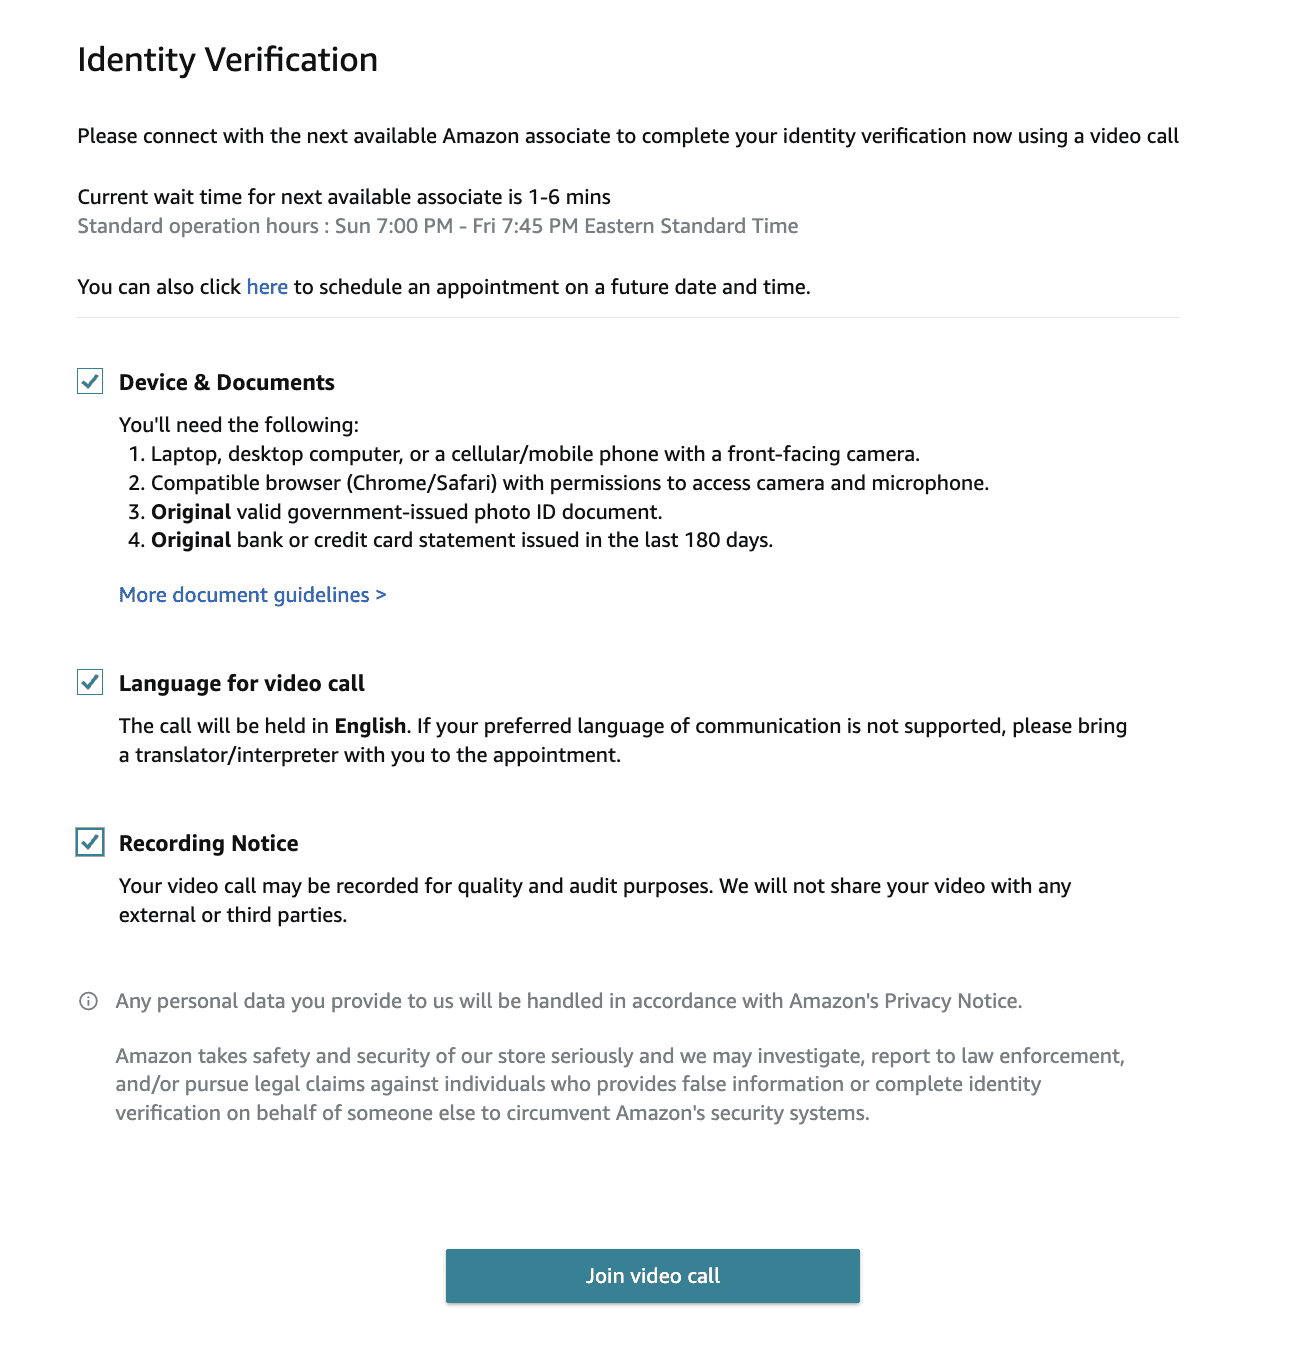
After submitting all of your documents, you will need to complete an Identity Verification via video call with an Amazon associate. This is so they can verify all of your documents and personal information you provided.
Unfortunately, this is now part of the process so we suggest doing it as soon as possible so you can start selling products on Amazon. You may have an option to take a call at the end of your application. If you cannot at that time, you can schedule an appointment for a future date and time.
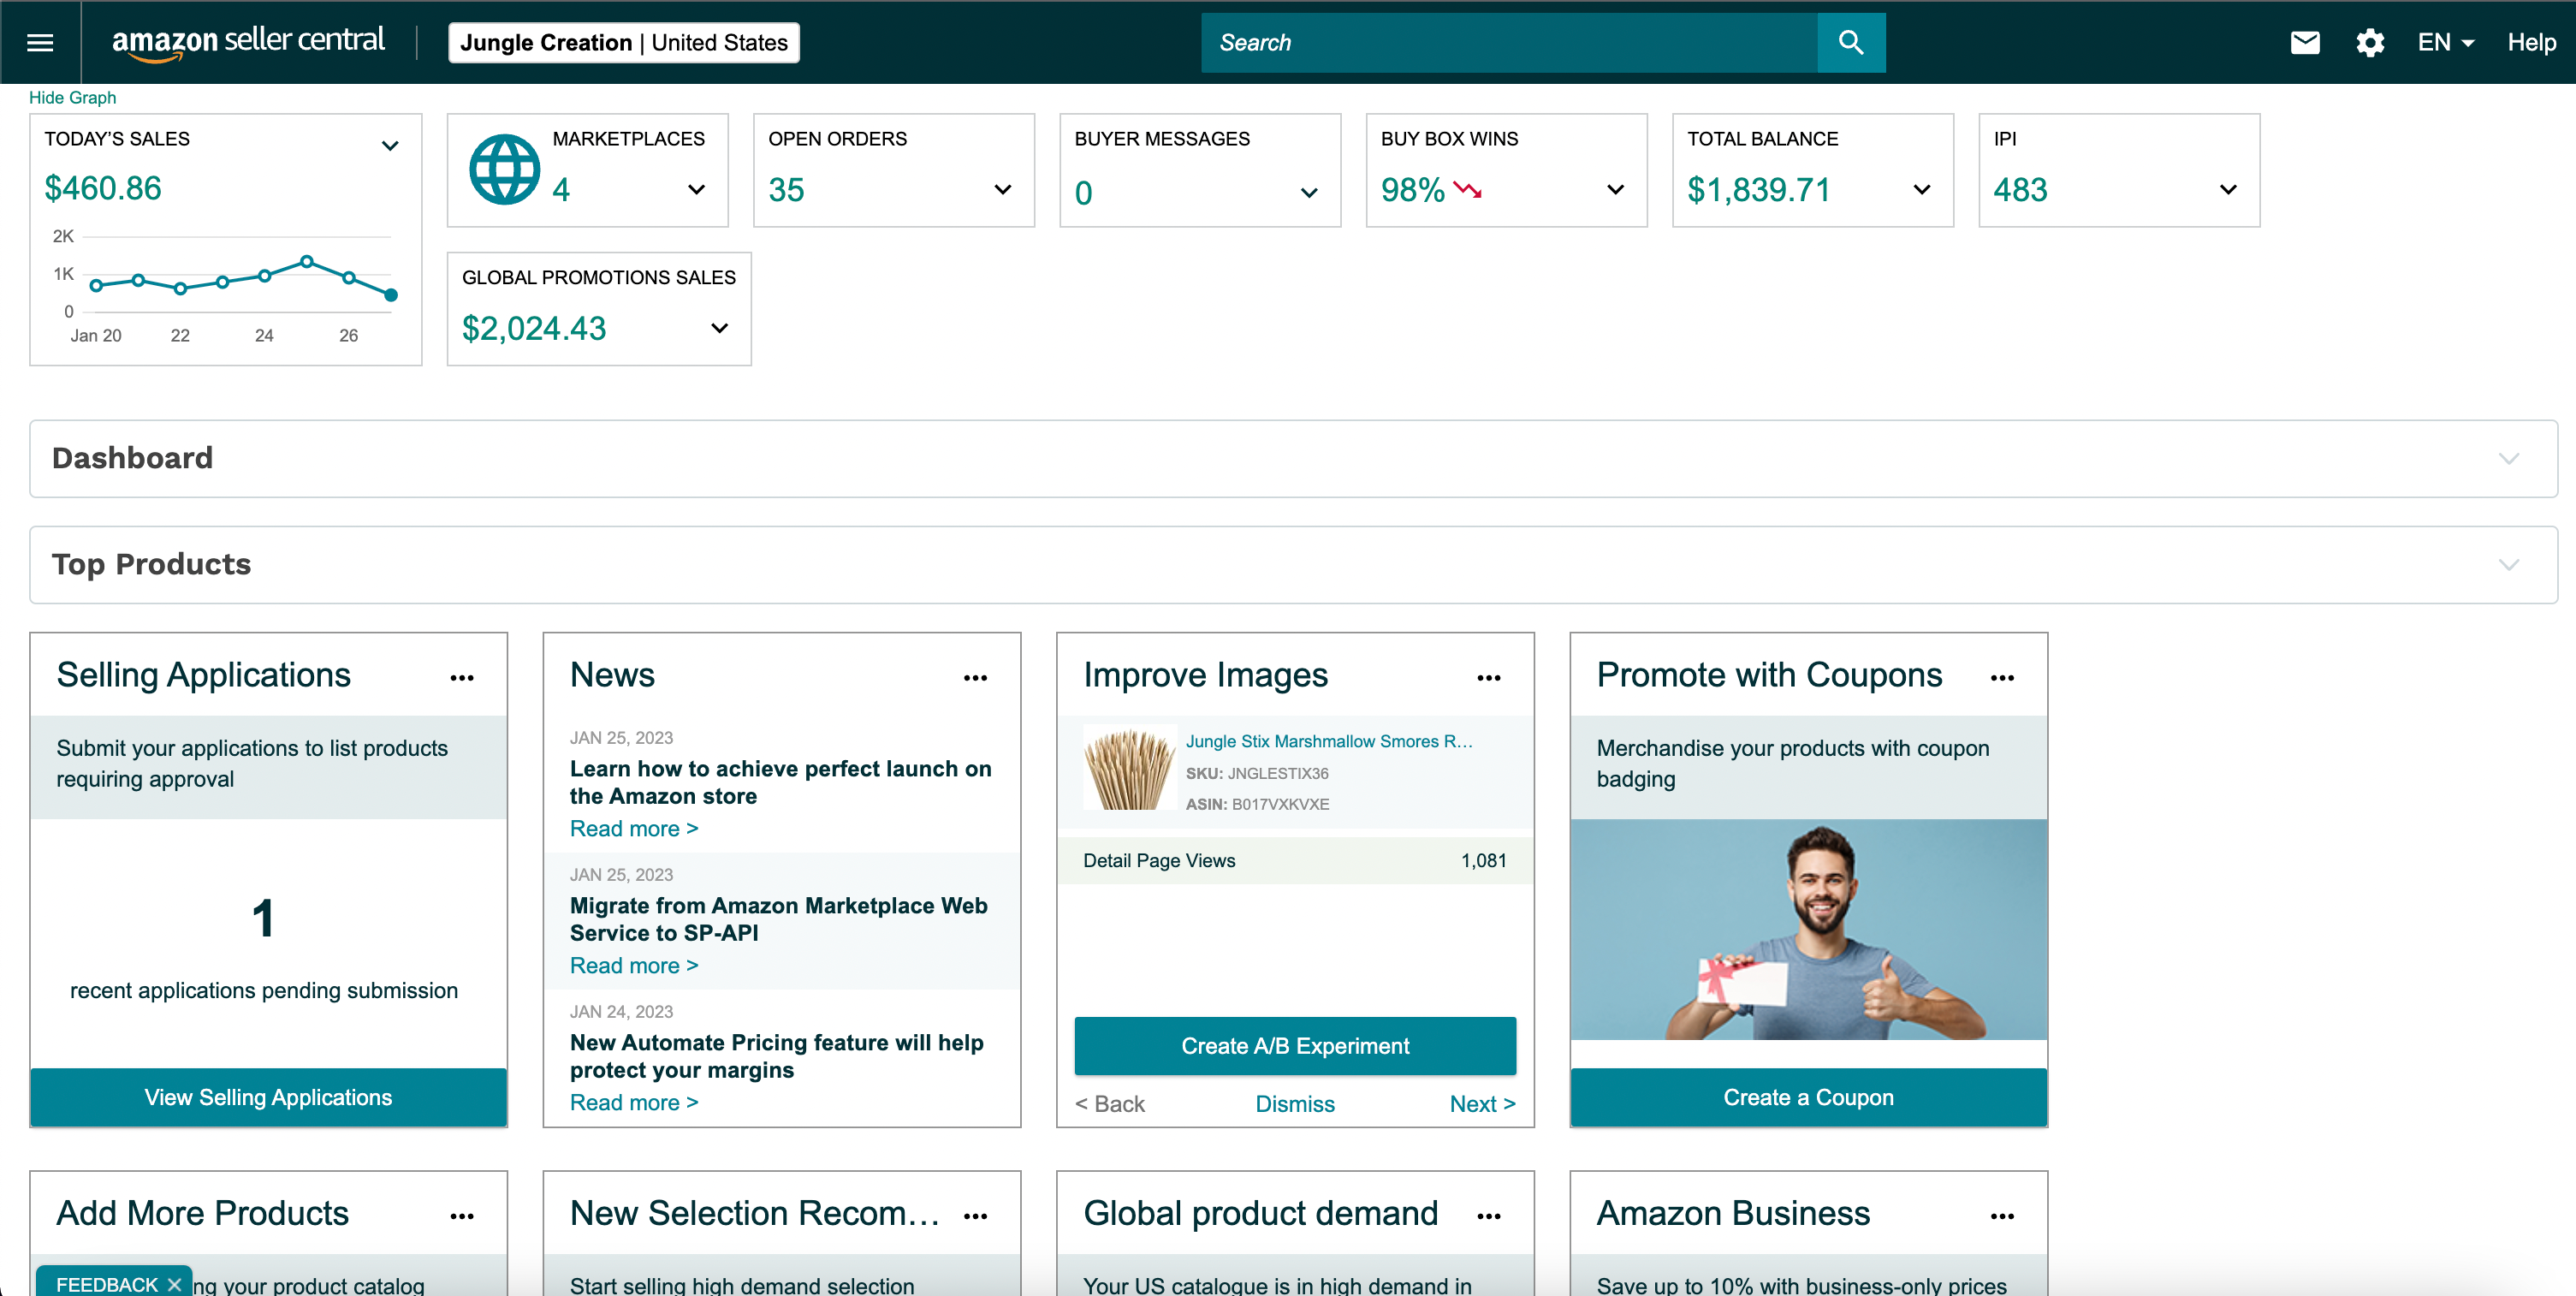
Once you’re verified, you’re in!
To be on the safe side, we recommend setting up 2-step verification on your Amazon seller account, for increased security. But, once your identity and business information have been verified, all you need to do to get started is to log into https://sellercentral.amazon.com.
And this is what your seller account home screen will look like (without any sales yet, of course).
How much does it cost to sell on Amazon?
What’s great about selling on Amazon is that you can get started without spending any money.
However, if you’re planning to use the private label business model there are costs involved in order to purchase your inventory before you sell it (at a higher price). But, it may not be as expensive as you might think.
In fact, according to a Jungle Scout survey of 3500 Amazon sellers, 16% started their businesses with less than $500 — though the average reported cost is $3,836.
Plus, regardless of your chosen fulfillment method, there will be some fees associated with your seller account.
What are Amazon’s fees?
Here are a few of the Amazon fees that you may be required to pay as an Amazon seller:
- Amazon referral fees: This is the fee that Amazon takes as a commission for selling on its platform. It varies from category to category but ranges between 12-40%. Most products have a 15% referral fee.
- Individual seller fee: This is a flat $0.99 added to each sale you make on top of the referral fee. Sellers only have to pay this per-item fee if they’ve opted for an individual seller account, rather than a professional plan.
- FBA fees: If you use Amazon’s FBA program, you’ll have to cover the shipping and handling costs for Amazon.
- Other Amazon fees: You may also have long-term inventory storage fees (if you use Amazon FBA), media fees (if selling books, DVDs, etc), and advertising costs.
What to know know before creating an Amazon seller account
Here are a few more Amazon-selling basics that you should know.
Amazon’s Best Sellers Rank (BSR)
Amazon organizes all of its products by giving each a Best Sellers Rank (BSR); the more popular an item (and the more sales it makes), the higher the BSR.
In addition, departments (also called parent categories) on Amazon have their own taxonomy of BSRs, as do their sub-categories.
Selling on Amazon Prime
If you’re using Amazon’s FBA program, and you have enough inventory to spread around through its fulfillment network, then your product will qualify for Amazon Prime.
Selling Prime is key to being successful on Amazon as it means your products will be shipped to customers within 2-3 days.
Plus, you get the “Amazon Prime” badge on your listing, which means you’ll have a better chance of selling your product. Customers love fast shipping.
But if you’re selling FBM, you can still sell Prime as a Merchant Fulfilled Network seller. To do so, however, you’ll have to apply to Amazon’s Seller Fulfilled Prime program.
Training for new Amazon sellers
Here at Jungle Scout, we know that learning everything you need to know about selling on Amazon can be overwhelming. So, to help you ramp up more quickly, we have an extensive library of free resources.
In addition, if you already have a Jungle Scout subscription, you have access to our members-only Academy. It has video lessons for both beginners and advanced sellers alike.
Create an Amazon seller account today
Now that you know how easy it is to go through the Amazon seller registration process, don’t waste any more time.
If you have any questions or want to know more about how create an Amazon seller account or how to start an Amazon business, please feel free to leave a comment below.
Start your selling journey today!
Start selling on Amazon.
Learn more about how you can use Jungle Scout to launch, grow, and run your Amazon business.
Brian Connolly is an Amazon seller, ecommerce expert, and writer for Jungle Scout. He lives in the New Jersey Shore area with his wife and cat. When he isn’t writing advice online for aspiring and experienced Amazon sellers for Jungle Scout, he spends his free time boating, fishing, and selling boating-themed items on his Amazon business.
Stay in the Amazon seller loop
Market intelligence for sellers
The industry-leading product and keyword data to help you sell smarter on Amazon.