When selling products on Amazon, there is no one-size-fits-all solution. A strategy that works well for one brand may not work for another. Your competitor can be selling the same exact product you’re selling, but their price points, images, or listing content may compel customers to purchase their product over yours.
Creating an effective listing that persuades customers to purchase your product requires care and research, and is not a “set and forget it” process. That’s why it is very important to run split tests on various aspects of your listing and see which versions perform best.
In this article, we’re going to go over:
- What Amazon AB testing is
- Why you should split test your main image and other listing components
- How to run a split test
- A split test case study of a Jungle Scout product
Afterward, you’ll see how much of a difference split testing can make for your business, and why it’s a seller’s secret weapon.
What is Amazon AB testing?
Split testing, also known as A/B testing, is a method used by Amazon sellers to optimize various elements of their product listings or advertising campaigns.
The goal of split testing is to compare two or more versions of a particular element to determine which one performs better in terms of key metrics such as conversion rates, click-through rates, and overall sales.
For Amazon sellers, split testing can be applied to different aspects of their product listings, including:
- Product titles. Sellers may test different variations of product titles to see which one attracts more clicks and conversions.
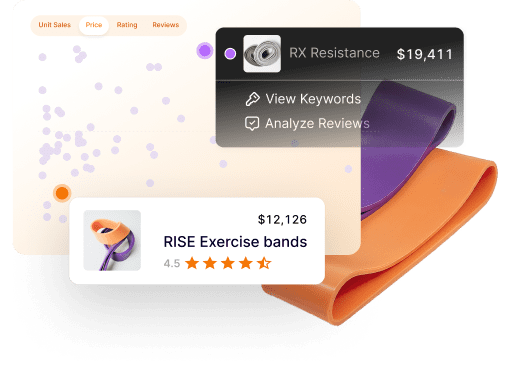
- Product images. Testing different images or graphics for the main product photo can help identify which visuals resonate better with potential buyers.
- Product descriptions and bullet points. Test product descriptions or bullet points by changing wording, formatting, or the information included to see which version results in higher conversions.
- Pricing. Sellers might experiment with different pricing strategies to find the optimal price point that maximizes sales and profitability.
To split test different versions of your listings on Amazon, you will need to let each version of your listing run separately for a specific period of time, as you cannot test different versions simultaneously — unless your brand is enrolled in Brand Registry; more on this soon.
Why run split tests on your Amazon listings?
Figuring out what makes consumers purchase products online can potentially add thousands of dollars in sales to your business. A/B testing is an effective way to do just that. If your product’s main image were turning people off to your listing and causing you to lose sales, you’d want to know that information, right? Let’s use this situation for a split test example.
Amazon AB testing example
To run a split test of two main images for your Amazon listing, you would want to test and compare at least two versions to learn which one produces the highest conversion rate. A higher conversion rate means more sales from fewer visitors.
You would let Version 1 run as the main image for two weeks, and Version 2 as the main image for the next two weeks. At the end of the four weeks, you would analyze the data and see which images significantly impacted conversions and sales.
Whichever image performed the best is the most effective out of the two, and clearly, what your new main image should be!
How split testing can improve your sales
Let’s try that same example, but this time with numbers. You’re selling a product that costs $25 and has a 10% conversion rate with your current main image. For the first two weeks of the test, you keep the same image you’ve been using but keep track of important metrics such as sessions and conversion rate.
After the first two weeks, your data tells you that your product was viewed 1,000 times and maintained a 10% conversion rate.
10% of 1,000 = 100 sales
100 sales x $25 = $2,500 in revenue
For the second half of the split test, you change the main image to your second option and let that run on your listing for another two weeks. After the next two weeks, your data tells you that your product was viewed 1,000 times but now has a conversion rate of 12%.
12% of 1,000 = 120 sales
120 sales x $25 = $3,000 in revenue
That small increase in your conversion rate gave you an extra $500 in sales in two weeks! The simple move of swapping out your main listing image brought in an additional $1,000 in sales each month.
What else can you split test on your Amazon listings?
Your additional product images are some of the most important elements for a successful product listing on Amazon — not just your main image. Because the customer cannot see or feel the product in person, they need the best visualization possible — something only sellers can provide.
Poor images often result in fewer clicks and even fewer sales, but they’re not the only elements of a listing that influence conversions.
Now that you have the best version of your main image, you can start running tests on other aspects of your listing, such as the title, price, bullet points, and description, to fully optimize your listing.
READ MORE | Amazon Product Listing Optimization in 2024
Title
The title is what your customers will see after the main image, within Amazon’s search results. You need to show your customer exactly what your product is and any important information upfront, such as size and functionality.
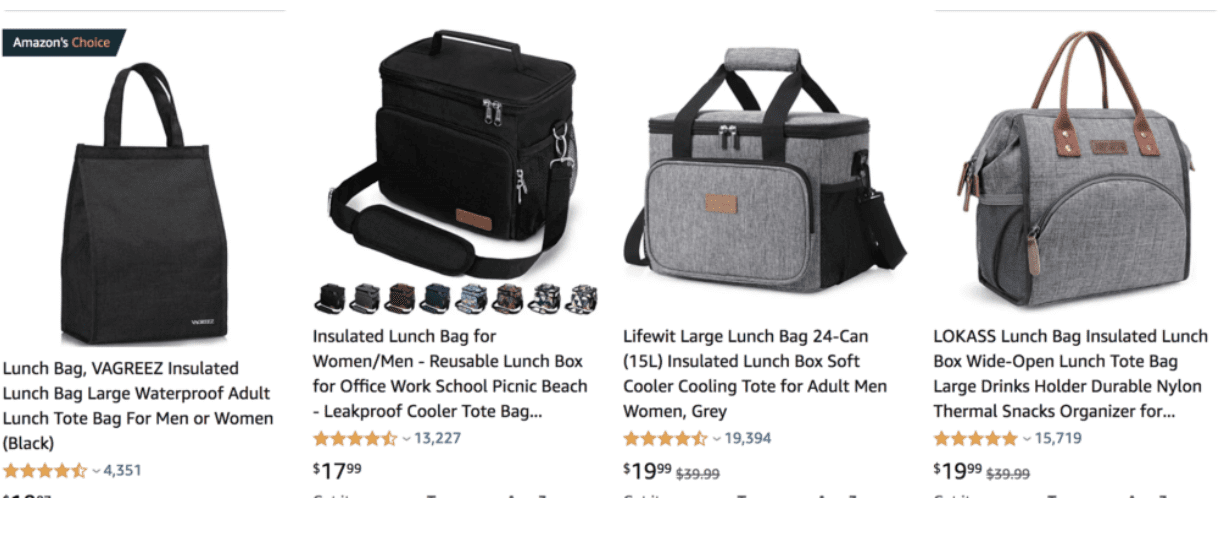
Which product in this image above would you most likely click on? For me, it would be the third product, the only one that includes the storage capacity information in the title.
If you don’t include that information immediately, a customer may click into your listing — and immediately out of it — if the product is not the size they’re looking for.
Test out different versions of your product title to see if it makes a difference in click-through rate or your overall conversion rate. Just remember always to follow Amazon’s listing guidelines.
Price
The price of your Amazon product is one of, if not the most influential factor in a customer’s purchase decision. Customers may opt for the cheaper option if your product is too high. If it is too low, your product may come across as cheap or of low quality, or you could start a price war with the competition.
Knowing how to price your Amazon product can be difficult, but it shouldn’t be taken lightly. Test out different price points using the same format as we did in the above example.
Run one price for two weeks and a second price for another two weeks. Whichever price point produces the highest conversion rate or sales is the one you should keep.
READ MORE | 2024 Amazon Seller Pricing Strategy – How to Price a Product
Bullet points
Your bullet points give you the room to go into full detail about your product’s features and benefits. You want the copy to be a good mix of informative and compelling; make it informative so customers know exactly what they’re buying, but compelling enough to show them why they should buy your product, and not your competitor’s.
Test out different lengths of each bullet point and the order of the product features you want to highlight. If your bullet points are too long, a customer may not want to read through all of that text. Test out a shortened version of each bullet to see if it positively impacts your conversion rate.
Description
The description is the part of your listing that is “below the fold” but can still have an impact on conversions. Below the fold refers to the part of your product page that isn’t visible to your customer unless they scroll down in order to view it. (Keep in mind that the description is shown first on the Amazon mobile app.)
Amazon allows up to 2,000 characters in your product description, so make it count. A good practice is to include all of the same features and benefits in your bullet points but in more detail. You’ll have extra space to add more information and additional keywords you couldn’t fit in your bullet points.
Test out different lengths and orders of features you’d like to highlight. Include a brief story about your brand and test to see if it helps at all with conversions. Some customers may not get to read this section, but it is still important to optimize your product description for search visibility, and it is what customers will first read when shopping on the Amazon mobile app.
If you are enrolled in Brand Registry, you have the ability to create A+ Content that replaces the old text description. Because A+ Content is customizable and can potentially engage customers to purchase, most sellers think that it will produce higher conversions, but that might not always be the case. With a simple split test, you can easily figure out which version works best for your product!
3 ways to run split tests on Amazon
Many sellers can’t be bothered and skip split testing their listings altogether. Stay ahead of the competition and run tests so you can outperform them! Let’s go over ways you can split test your Amazon listings.
Manual split testing
Split testing manually can be a timely process but may add thousands of dollars to your bottom line if done correctly.
To manually split test different aspects of your listing, use the same process as the examples used above. Run different versions of a particular part of your listing and monitor various metrics to see which version performs better.
For you to accurately measure each change made to your listing, test only one component at a time. For example, in month one, test your images; in month two, test your titles, and so on.
If you test multiple components of your listing at once, you won’t know which component is causing the change.
How to view your listing metrics
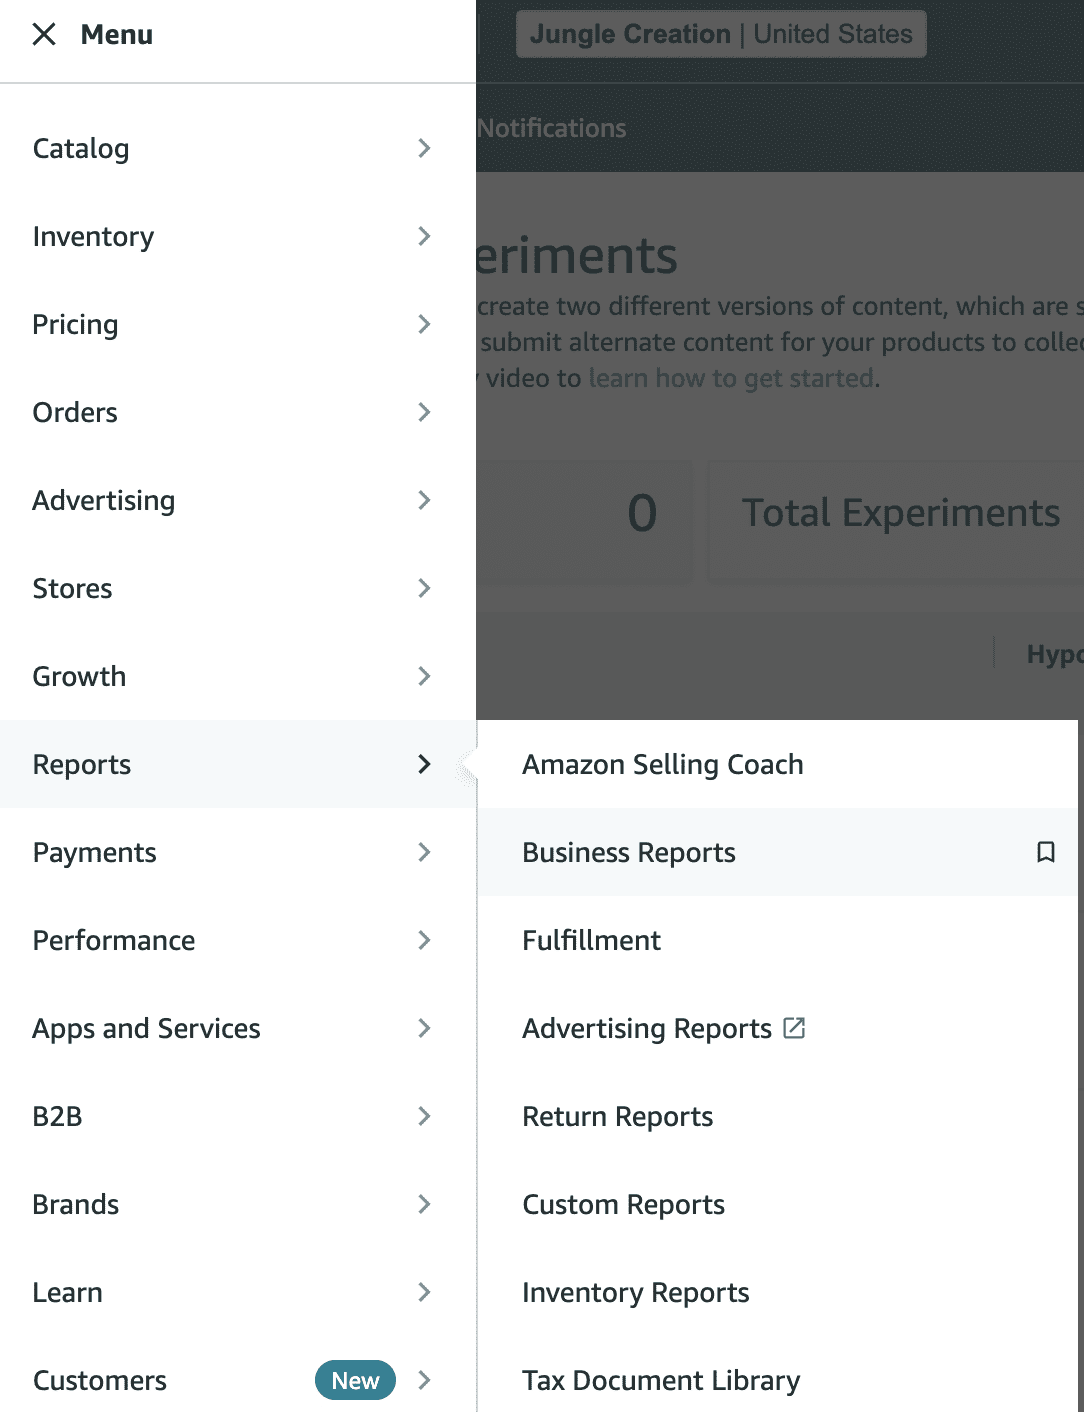
To monitor if there are any significant changes to your metrics, you will need to look at Amazon’s business reports within your Seller Central account.
In Seller Central, go to Reports > Business Reports.
On the left-hand side, click on “Detail Page Sales and Traffic By Child Item.”
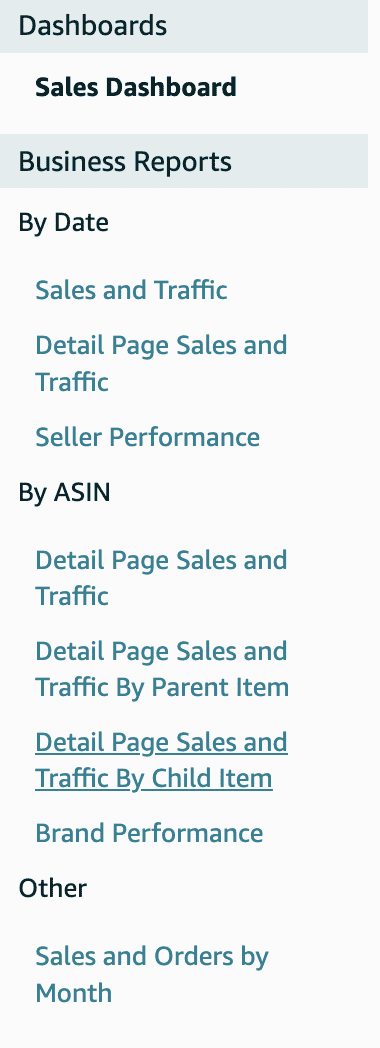
In this report, you will see each product you are selling and its various metrics such as Sessions, Buy Box Percentage, Units Ordered, Product Sales, and Unit Session Percentage (conversion rate). You can also choose the date range you want to view.
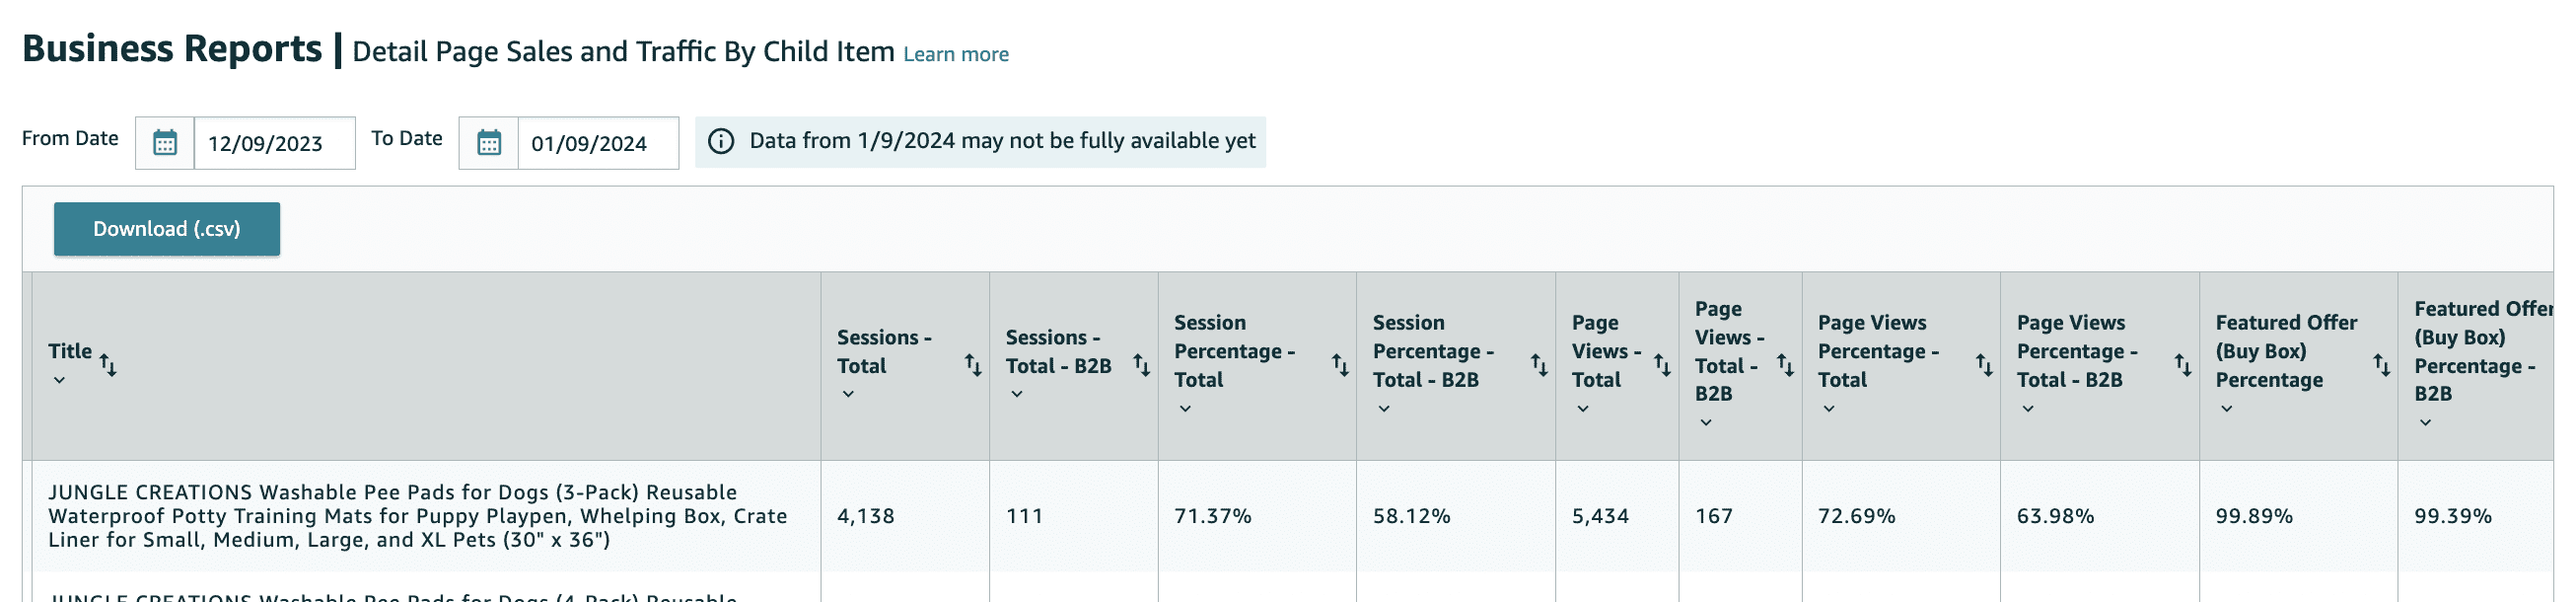
This is a great report to monitor periodically so you can see how your products are performing.
When running an A/B test, you want to let each version run for at least two weeks. This will ensure you have enough data to make a decision. If your listing has low sales, you should test for longer than two weeks to accumulate more data.
In a spreadsheet, make note of the start and end dates of each version you’re testing so you know when to look at your business reports. Check your sessions, conversion rates, and units ordered before and after each test, and make note of them on your spreadsheet to keep track of performance.
Analyze the data at the end of your A/B test to see which version performed better!
Manage Your Experiments tool
As mentioned above, Amazon has a new feature called Manage Your Experiments that is only available for brand-registered sellers.
The tool allows brands to simultaneously compare two versions of content against each other to see which version works best for your product. Unlike manually conducting split tests, both versions will be running at the exact same time, and Amazon will randomly split customers who view your listing into two groups. During the experiment, one group will see Version A, and the other will see Version B.
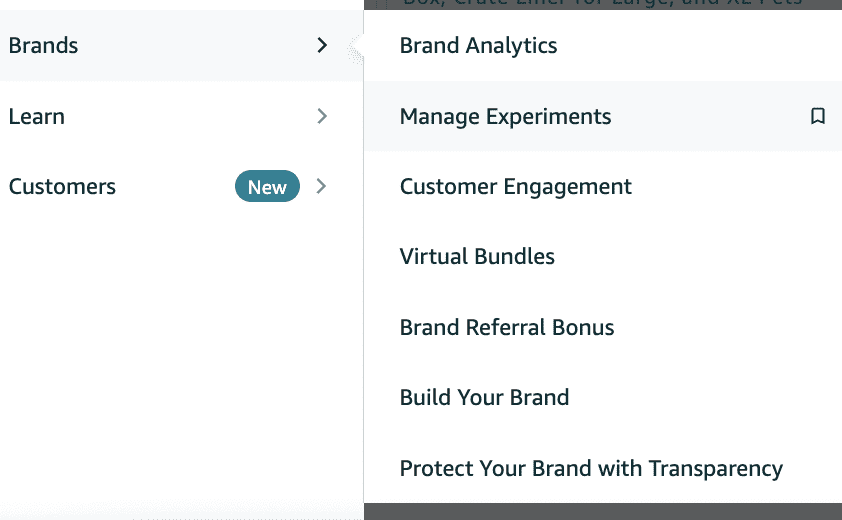
If you are enrolled in Brand Registry, go to the Brands tab and click on Manage Experiments.
With this tool, you are able to test different versions of A+ Content, Bullet Points, Product Images, Product Description, Product Title, A+ Brand Story, or even run a simultaneous test.
Click on “Create a New Experiment” to get started.
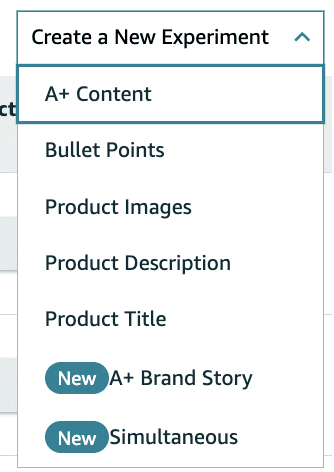
Simultaneous allows you to test your title, images, and bullet points at the same time.
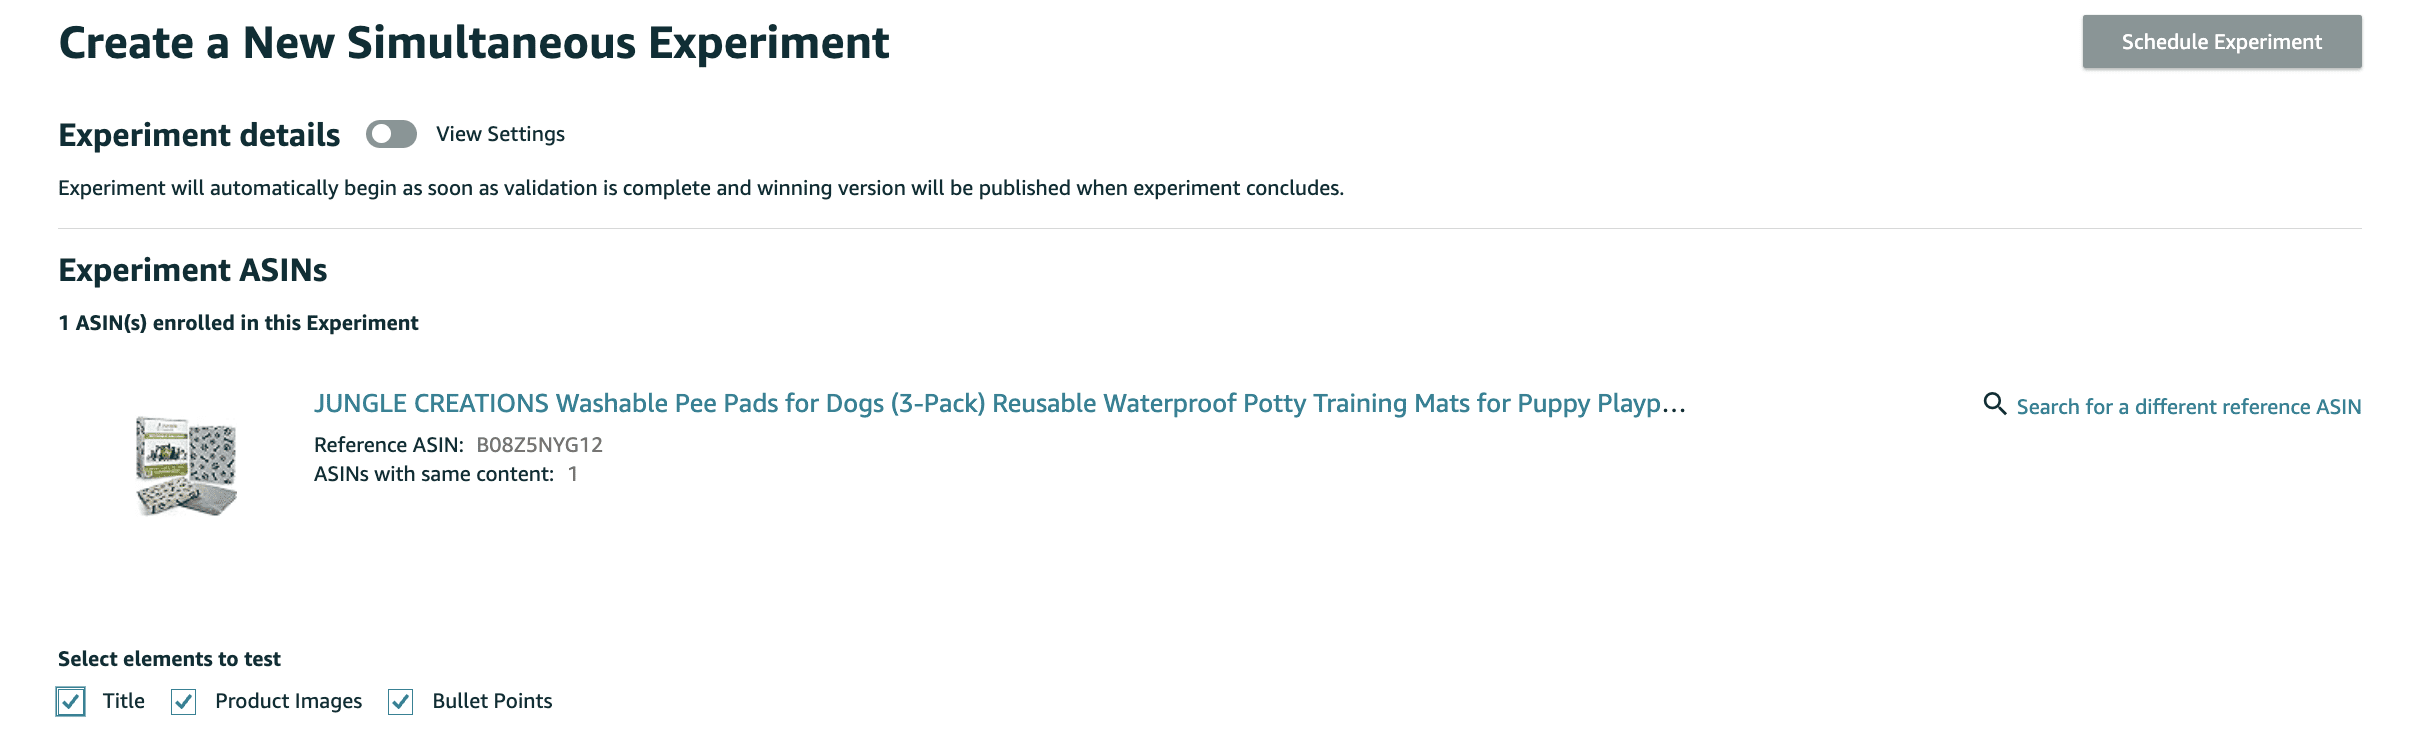
After choosing the experiment type, choose your product, enter the product information you want to test, and enter the duration of the test. You can choose from 4 to 10 weeks — this range allows Amazon to collect as much information as possible.
Once complete, click on “Schedule Experiment.” What’s cool about this tool is that you can view the results of the split test every week until the experiment ends.
Create a poll
Another option for split testing is to conduct a poll with your audience and let them tell you what they like best by providing them with options to choose from. This can be done on any social media platform, such as Instagram, Facebook, TikTok, or even with an email list.
With Instagram, you can create a carousel post with two main image options. Have your followers comment “A” or “B” depending on which one they prefer. Or better yet, you can run an actual poll within your Instagram Stories using a poll sticker icon.
The benefit of conducting a poll on social media is that your audience will likely be very honest with you. If they don’t like something, you will be sure to hear it! Use the results of the poll on your Amazon listing and check to see if your conversions improve over time.
Another way is to poll random people using a tool called PickFu. PickFu allows you to split test different images or infographics with various audiences that you can choose from. You can even have your poll shown only to people who are Amazon Prime members.
You can ask a question like, “If you were shopping on Amazon, which image would you likely click on?” and present the audience with two different main image options. Within an hour or so, you’ll have the results of the test with reasons why poll takers chose one over the other.
Jungle Stix split test
For this short case study on split testing, we tested descriptions on Jungle Scout’s Jungle Stix listing.
To conduct the test, we used the Manage Your Experiments tool and tested to see if A+ Content would convert better over a regular text description. You may be thinking that the A+ Content is going to be the better choice — think again!
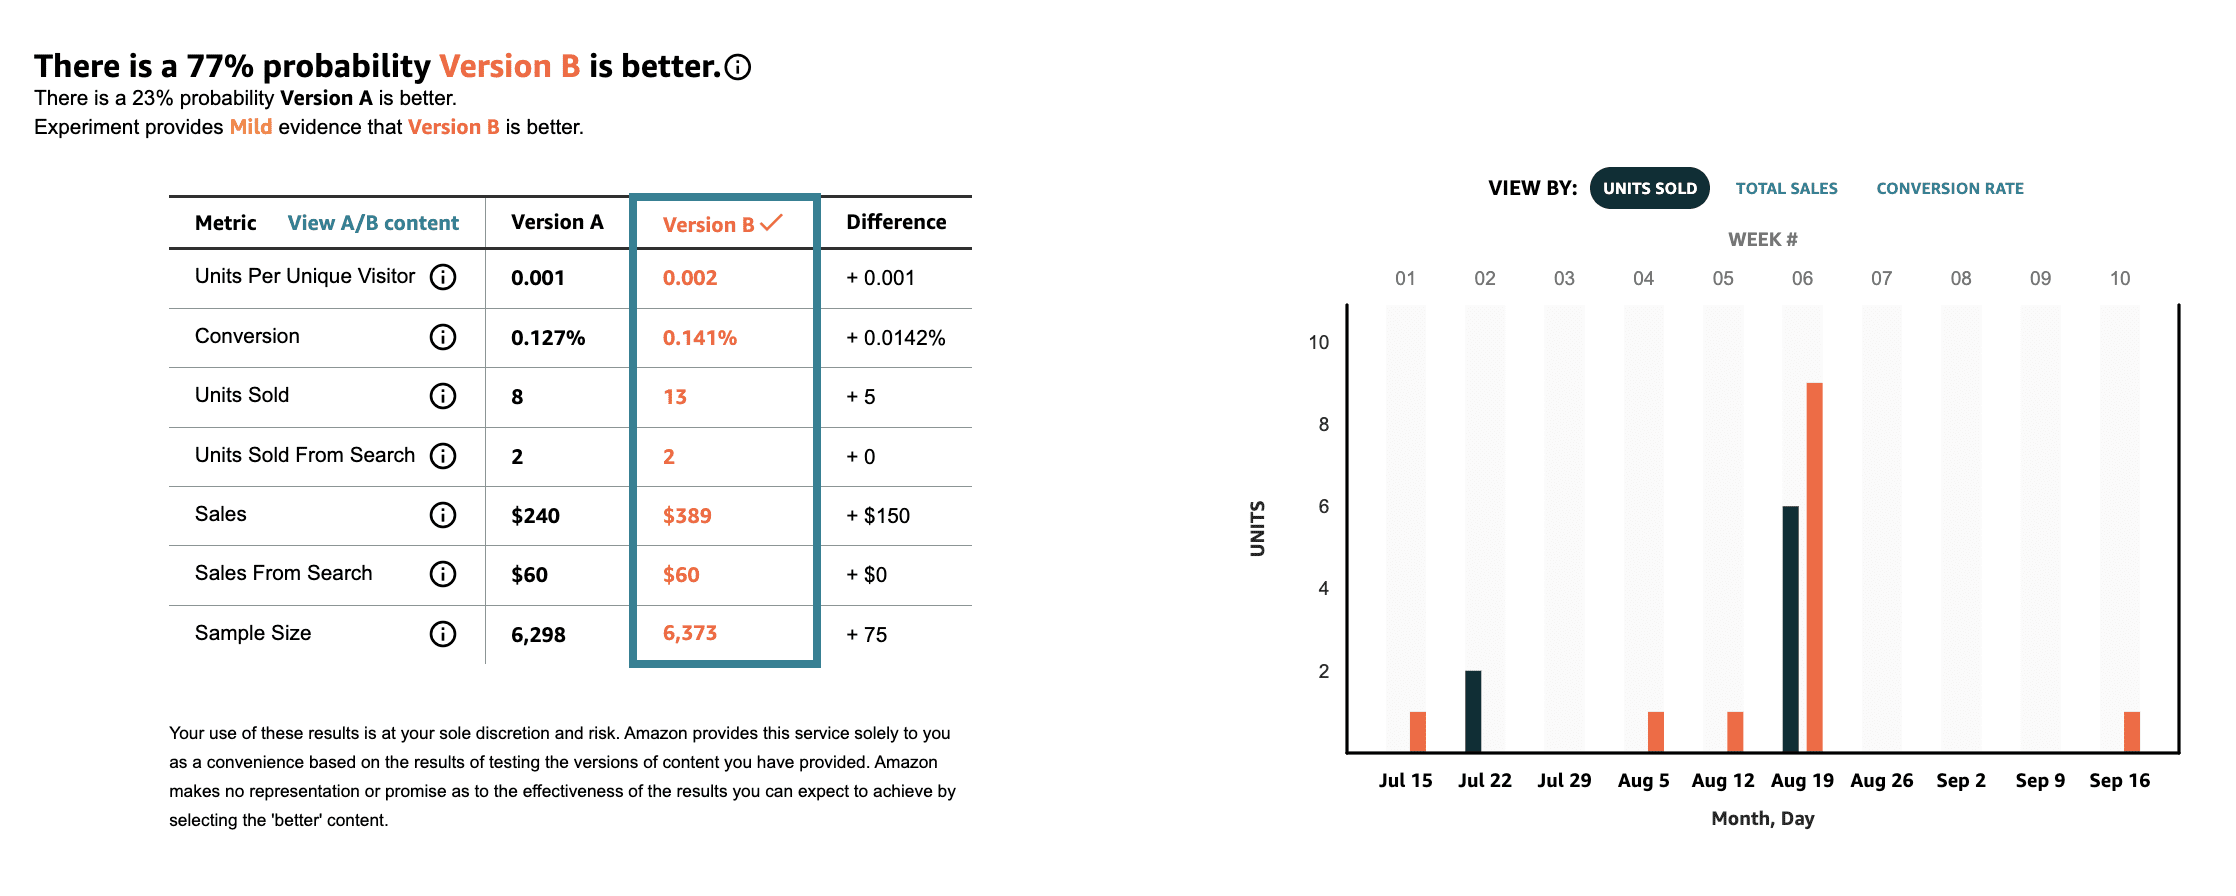
According to our split test, the regular text description actually performed better than the A+ Content. As you can see, Amazon states “There is a 77% probability Version B is better.”
To the right, there is a chart where you can see the difference between units sold, total sales, and conversion rates of each version.
I’m showing you this so you understand the importance of split-testing the content on your Amazon listing. Don’t rely on assumptions that one thing will work better than the other — use data to make your decisions!
Test, test, and test some more!
One small change to your Amazon listing can mean thousands of dollars lost or made. In order to stay ahead of the competition and grow your business, you need to test various aspects of your listing to ensure it really is fully optimized and primed to sell. If not, you could be missing out on sales.
We hope this guide showed you the importance of A/B testing on Amazon and how it can improve your overall performance. Now you’re ready to split test!
Do you have more questions about split testing? Let us know in the comments!
Start selling on Amazon with Jungle Scout
Brian Connolly is an Amazon seller, ecommerce expert, and writer for Jungle Scout. He lives in the New Jersey Shore area with his wife and cat. When he isn’t writing advice online for aspiring and experienced Amazon sellers for Jungle Scout, he spends his free time boating, fishing, and selling boating-themed items on his Amazon business.