 3 Comments


This article contains expert-led insights from a previous season of the Million Dollar Case Study.
MDCS is a free, comprehensive video series by Jungle Scout in which veteran Amazon sellers show budding entrepreneurs how to succeed on Amazon—by actually doing it. The series takes viewers step by step through the process of launching a real product on Amazon in real time—from product research to finding a supplier to advertising.
Check out our most current season here for the latest information on selling on Amazon.
In this episode, we cover product and lifestyle photography for your Amazon FBA listing.
- What is Lifestyle Photography?
- Should I hire a professional or go the DIY route?
- What is Amazon’s TOS (Terms of Service) for product photography?
- How to create attention-grabbing photos for Amazon shoppers.
- Missed an episode? See them all here.
We’re covering all of this today in our tenth episode of the Million Dollar Case Study. Watch the video, keep reading and don’t forget to download your FREE MDCS Workbook at the end of this blog post!
Subscribe to the Million Dollar Case Study list here, so you never miss an episode!
Before you get started, if you’re not already using Jungle Scout, you will need to get a Jungle Scout subscription to follow along with us and complete your product research.
Welcome Back to the Million Dollar Case Study!
For this episode, I interview Lenny Smith our in-house photo and video expert here at Jungle Scout. Today, we’re going to be talking about main images and the requirements associated with them, how to do lifestyle imagery, packaging images, as well as creating infographics.
Professional vs. DIY
Before we dive deep into product photography I think that the first question that comes to mind is should I hire a professional or go the DIY route? And truthfully I believe this is one of those tasks that hiring someone will save you tons of time and the quality of your photos will be vastly improved (no offense, photographers do this stuff for a living), so if at all possible then definitely outsource this part of your product launch.
I’m also going to save you time finding a product photographer because Jungle Market is your answer. It’s a database of verified, reviewed Amazon service providers, like product photographers.
Full disclosure: Jungle Market is a part of Jungle Scout. We founded it as a way to create easier, better quality connections between sellers and Amazon freelancers. This is the only Amazon-specific freelance marketplace out there and everyone is fully vetted by our team.
Now, if you’re on a tight budget and you’re comfortable going the do-it-yourself route then I’m going to show you some cool tricks and hacks Lenny shared with me. So, let’s get started!
The Big Picture
As an Amazon seller, there are several photos you will want to have on hand as you create your listing and they are as follows:
- Main image
- Lifestyle image
- Infographic
- Packaging image
You can have up to nine photos on your listing and I do recommend that eventually, you aim to fill up all those slots because the more photos you have, the more opportunities it gives you to sell your product to the customer.
So, where do I start?
A great place to start is to plan out the type of shots you want. At this stage, you want to generate ideas. There are a few places you can do that. The first one I recommend is by going to Amazon.com, searching for your product and seeing what your competitors are doing.
So let’s do that right now. As you know from previous episodes we have narrowed down our product research to a clamp-on keyboard tray, so in the search field I’m going to type in the phrase “keyboard tray” and immediately I’m shown a variety of thumbnails (main images) of competitors with similar products.

💡PRO TIP: Another good resource for product photography inspiration is by doing a Google image search.
The Main Image
This is the most important image of the bunch as it’s the image that catches Amazon buyers’ attention as they are scrolling through a product search.
Specs:
- Must be against a white background
- Product must take up 85% of the image
- No additional items such as props, logo, or text
- Must be at least 1000px wide
- Square crop
The most important thing to keep in mind with the main image is that according to Amazon’s TOS you can’t use any type of drawings, badges, watermarks, or text on your main image.
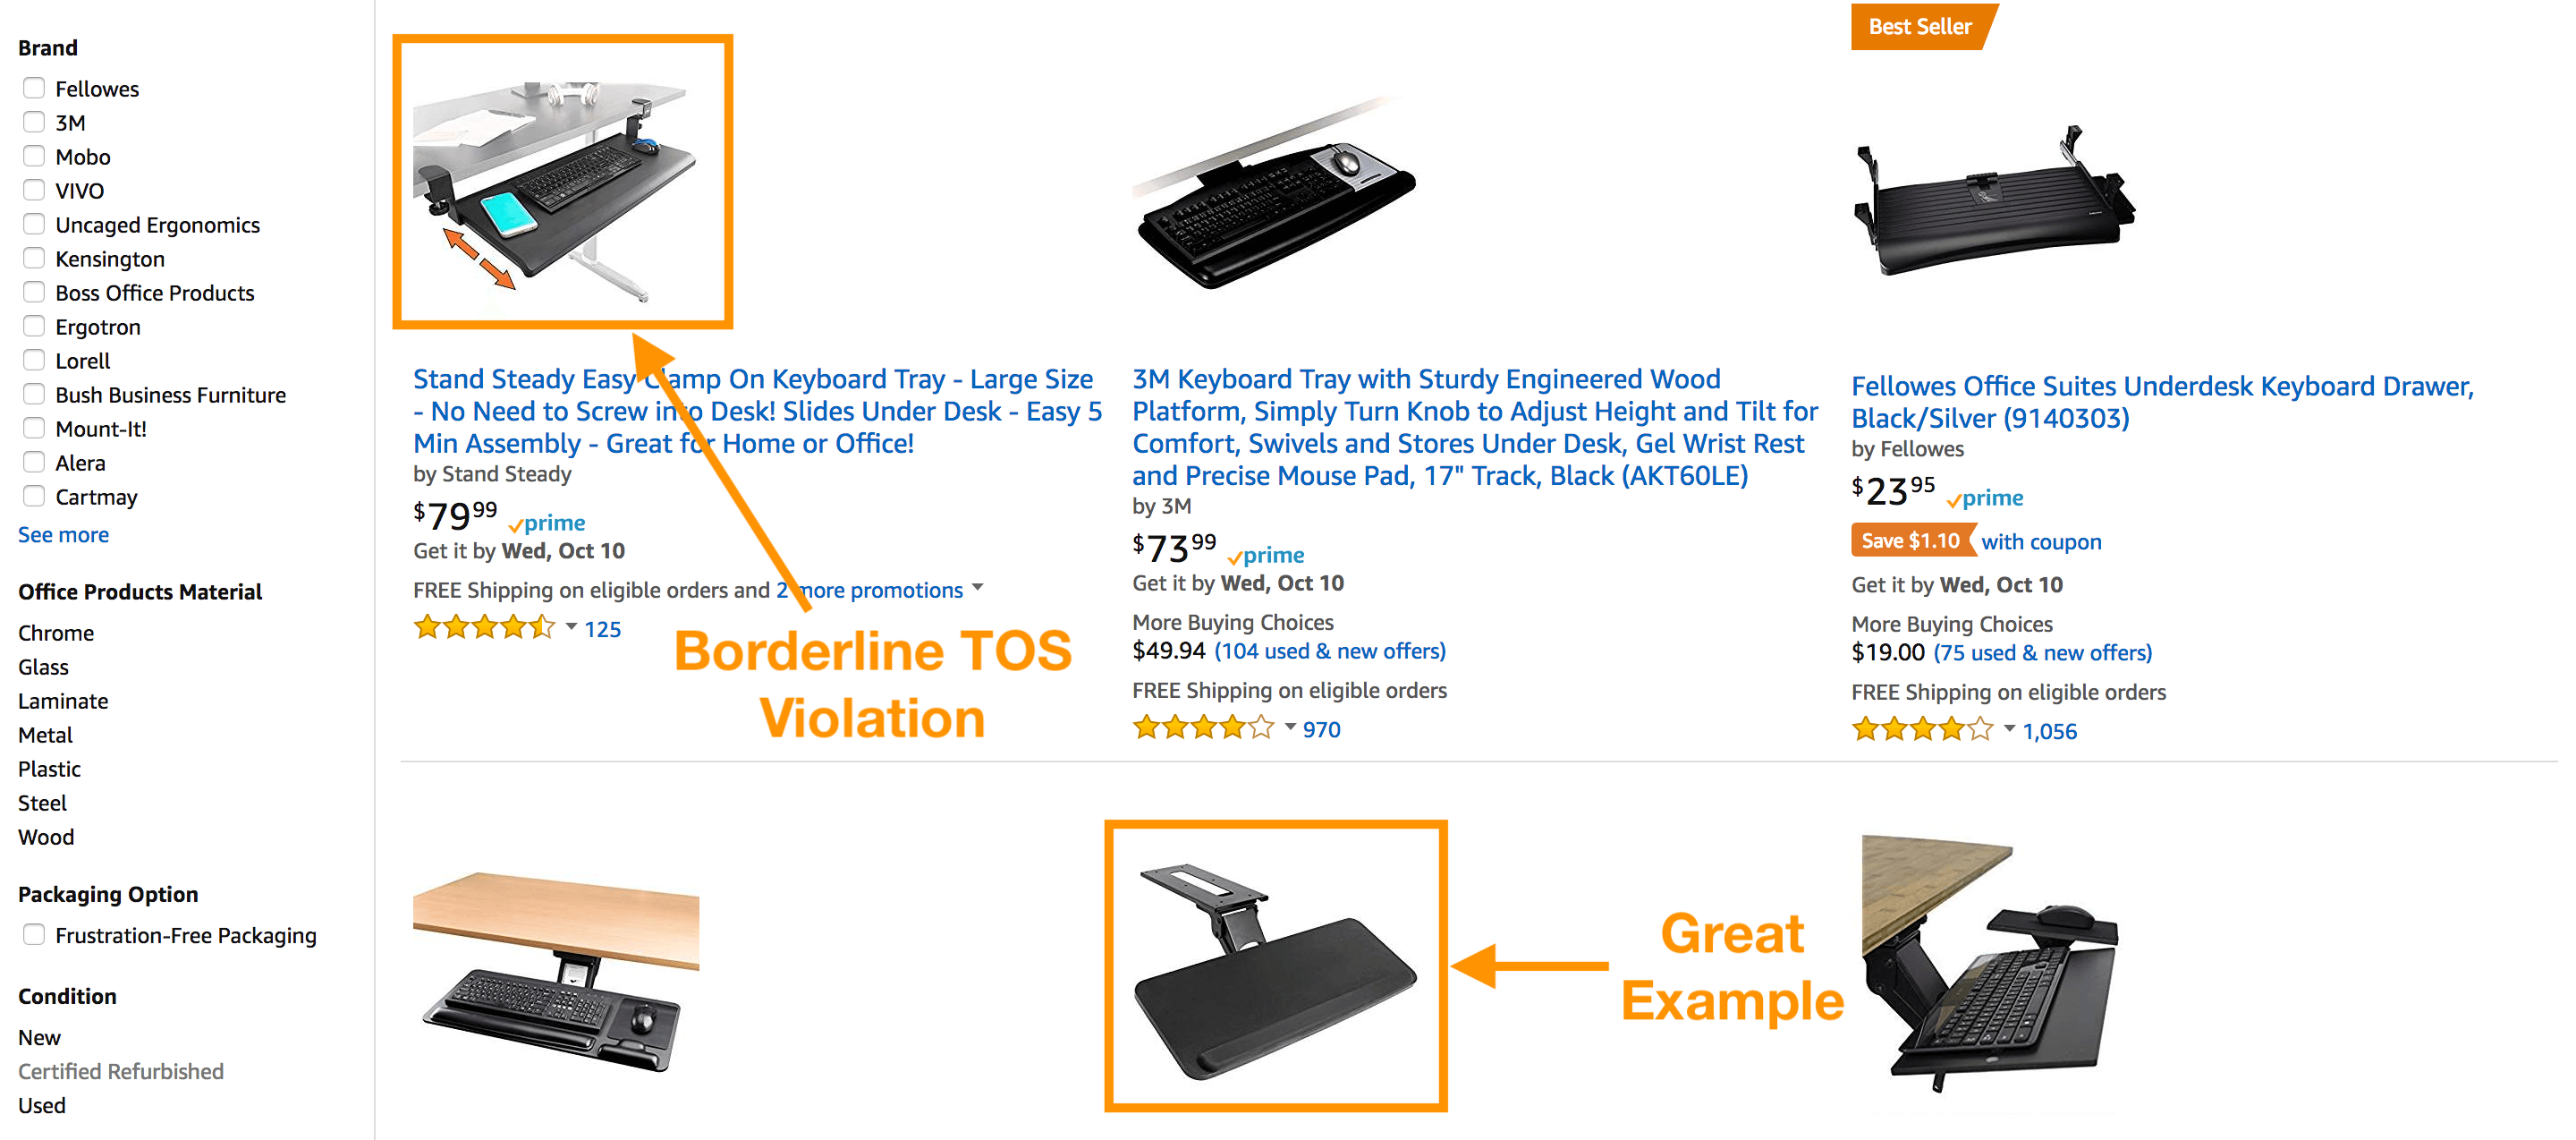
Study the competition
As I scroll through my search query I begin to see similarities among the different products which is an indication of the type of shot that works: forty-five-degree angle side shot.
The good thing is that with a lot of those shots being similar, that might also give us an opportunity to find a different, more creative angle that will stand out to our target market.
At the end of the day, you would rather have more options to choose from and try to find which one looks best on your product listing. This helps you down the road to be able to split-test different images to see which ones get the most clicks.
Lifestyle Images
Lifestyle images are essentially where you show your product being used. These are really fun because you get to see real people using the product. This is a good opportunity to show off the typical person who will be using your product. The idea here is that you want the customer looking at your listing to see themselves using that product. That’s why lifestyle images are really great.
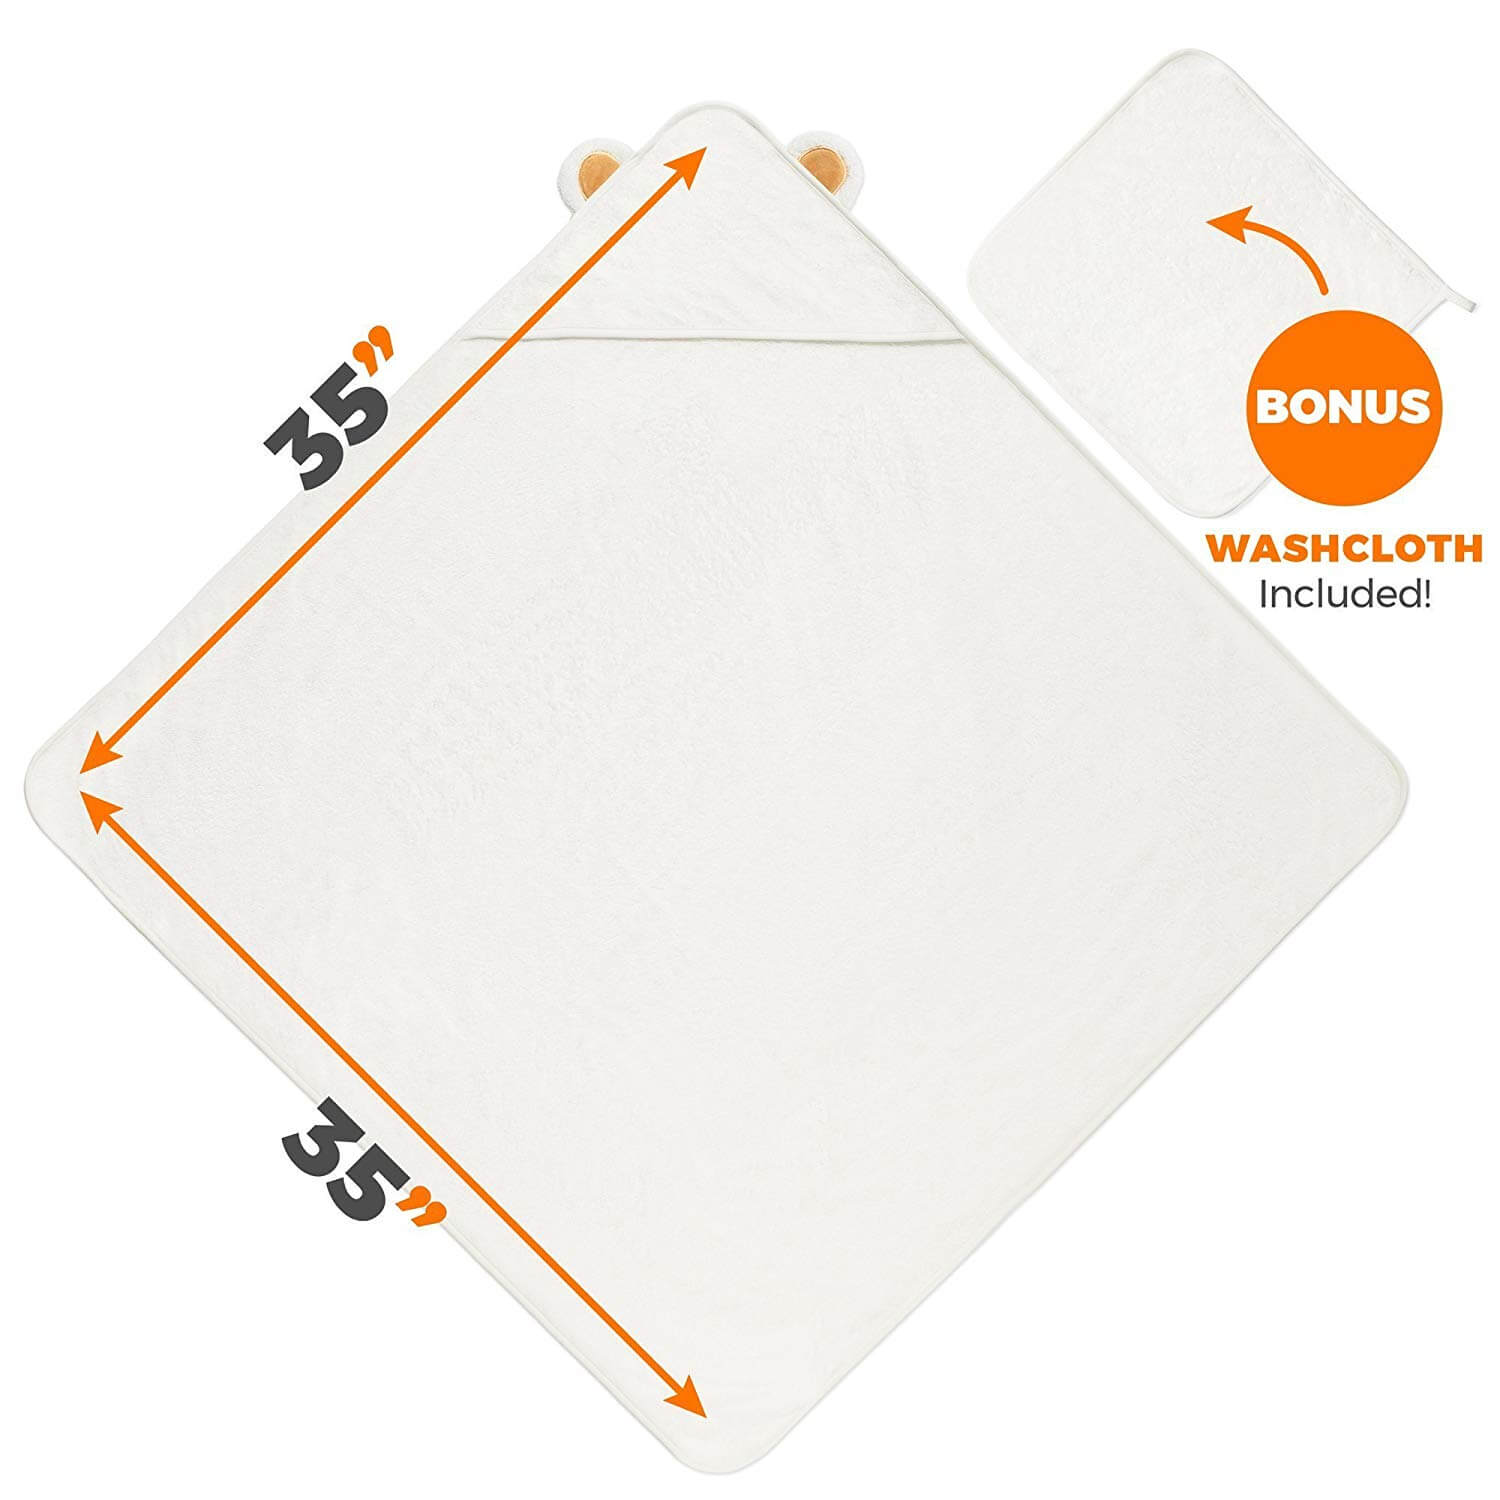
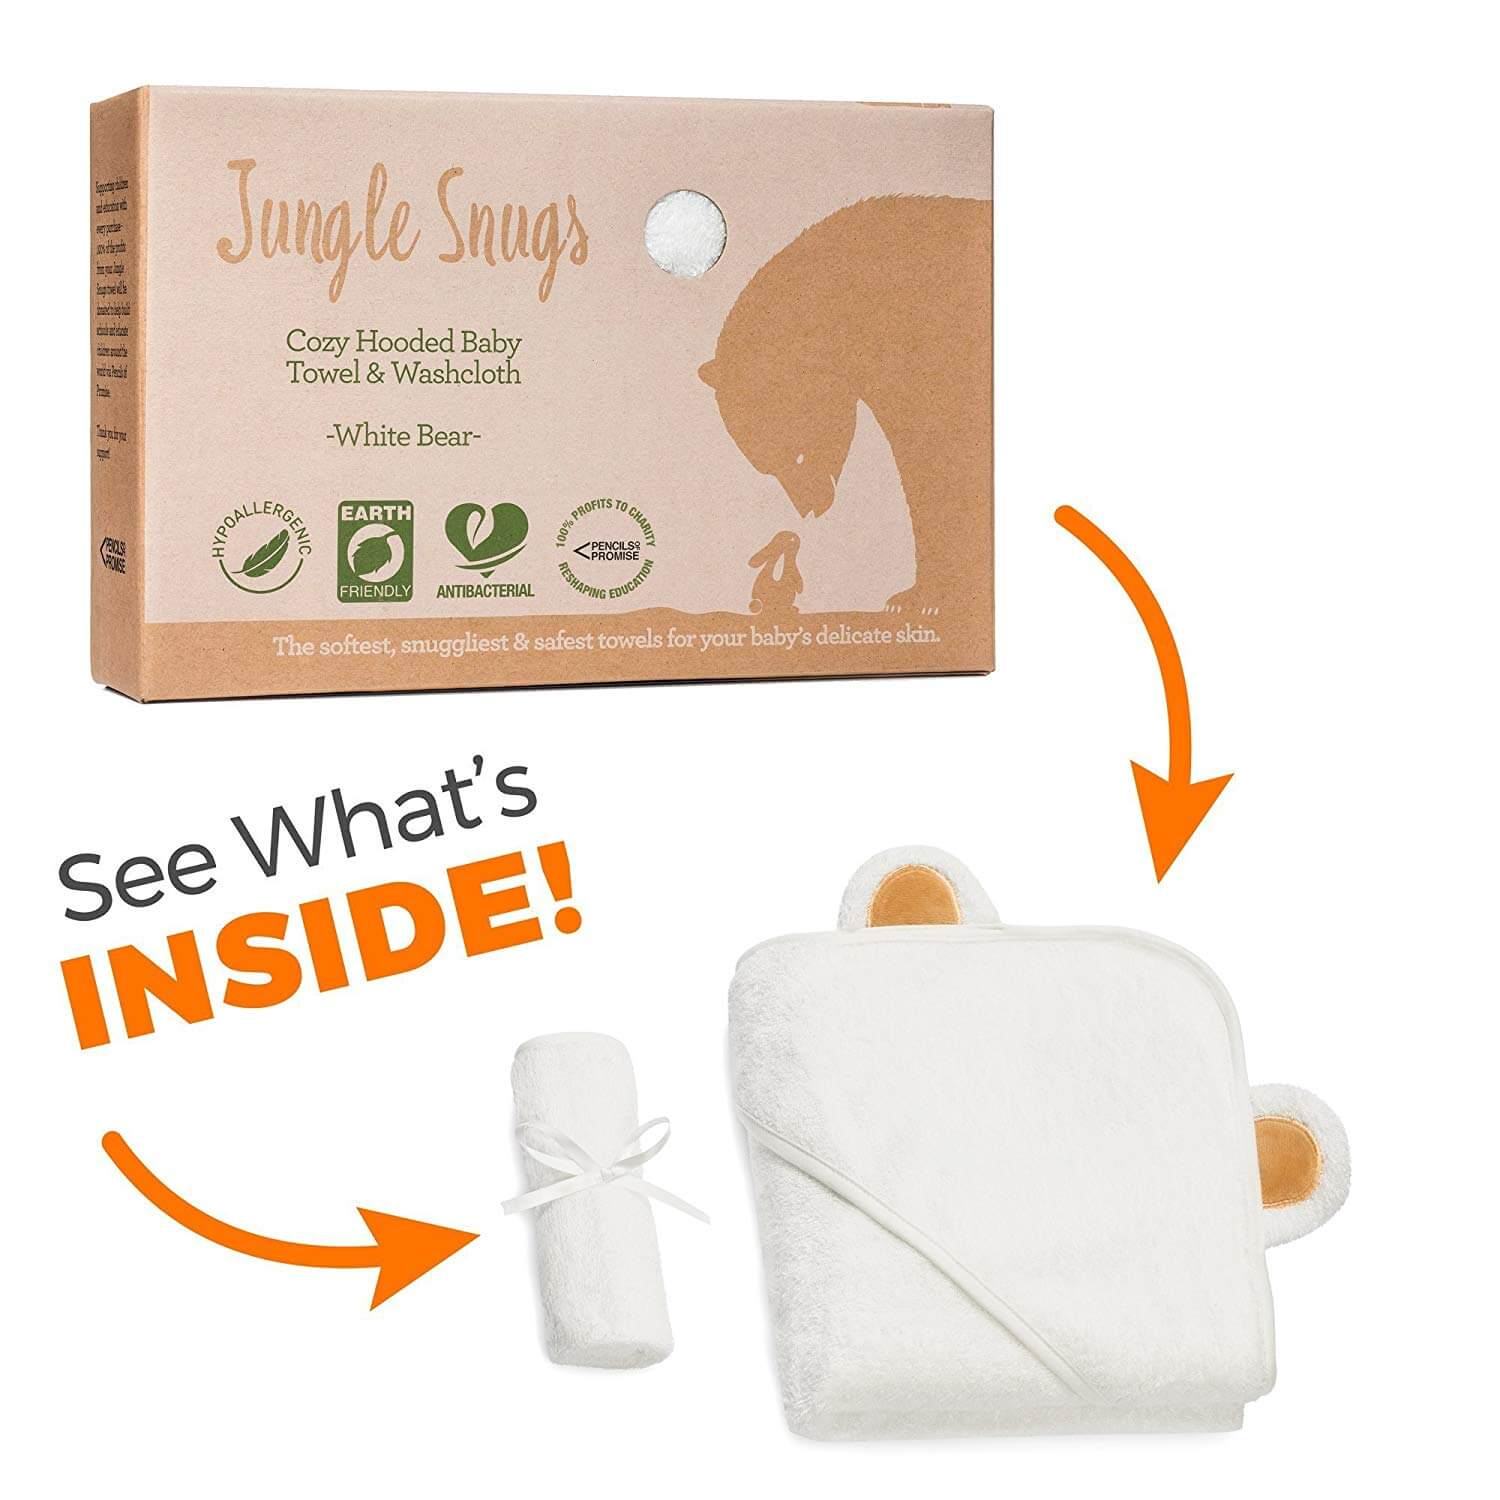
For a good example of a lifestyle image, let’s take a look at one of the previous Million Dollar Case Study products, the Jungle Snug hooded baby towels.
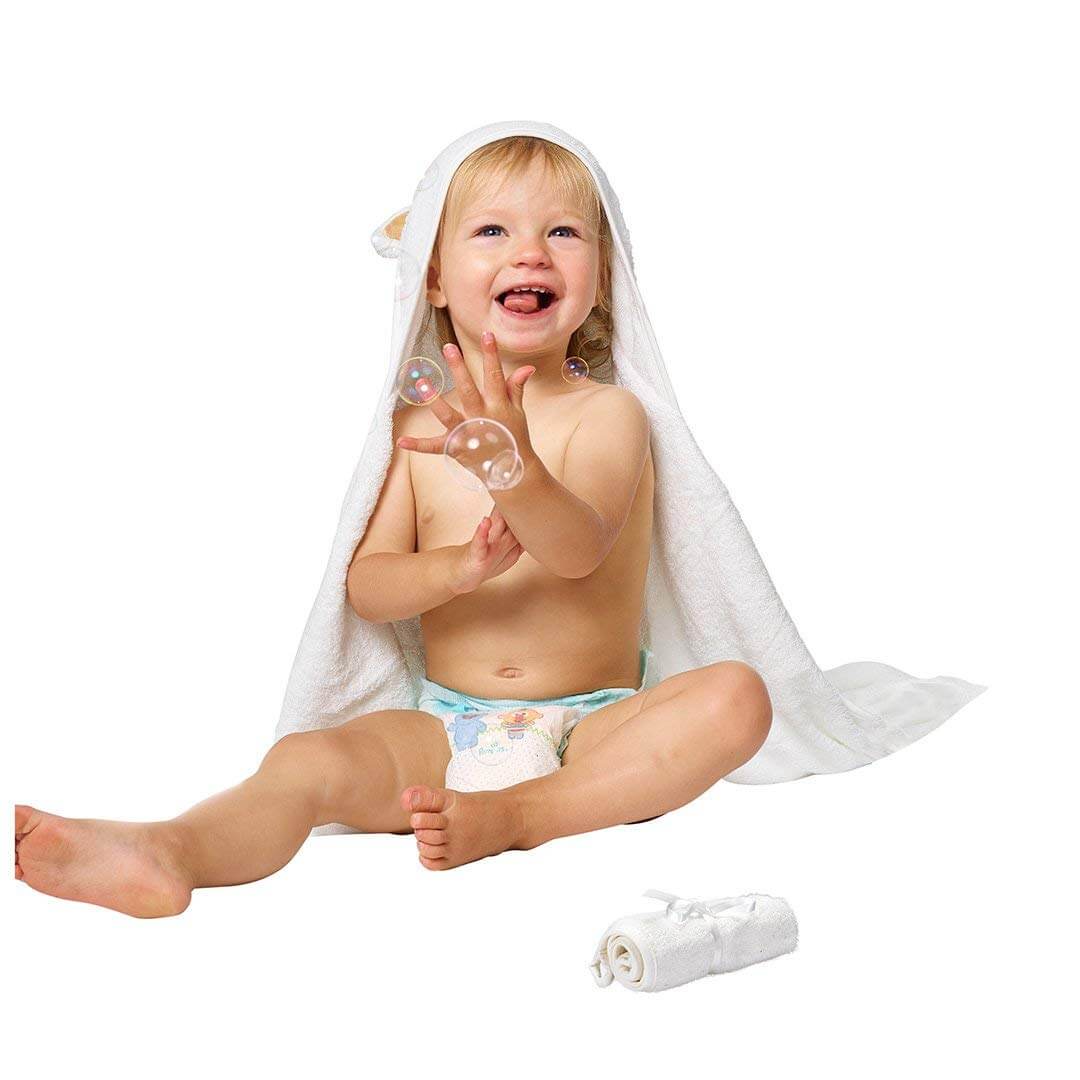
In this picture, we have a little baby wearing the hooded baby towel. She’s obviously smiling and happy. We want parents to be able to see this and think, “Wow, if I were to have that towel when my baby got out of the bath, instead of being cold and crying, she’d be all warm snuggly and happy.”
What we are going after here is evoking an emotion. We all know that emotions are what helps people buy and that’s why lifestyle images are so great.
Planning your photo shoot
All right, so the specific things that you’ll need. Firstly, you need the product, of course, so have a sample of your product ready to go. You’ll need a friend or family member who’s willing to model the item for you. You’ll also need a location. The location will be dependent, of course, on your product.
If your photo shoot is going to be an interior shot, you want that to ensure that the area is well-lit. If you’re going to be shooting outside, one thing to keep in mind is that you get the best light at the start of the day and at the end of the day. The middle of the day, the light is very harsh. You get bad shadows on your subjects and so forth.
But now, coming back to the model and the location, here’s where I’d tap into who’s your target audience. Who’s the typical kind of person you’d want in this photo?
Guess who our target market is in this picture?
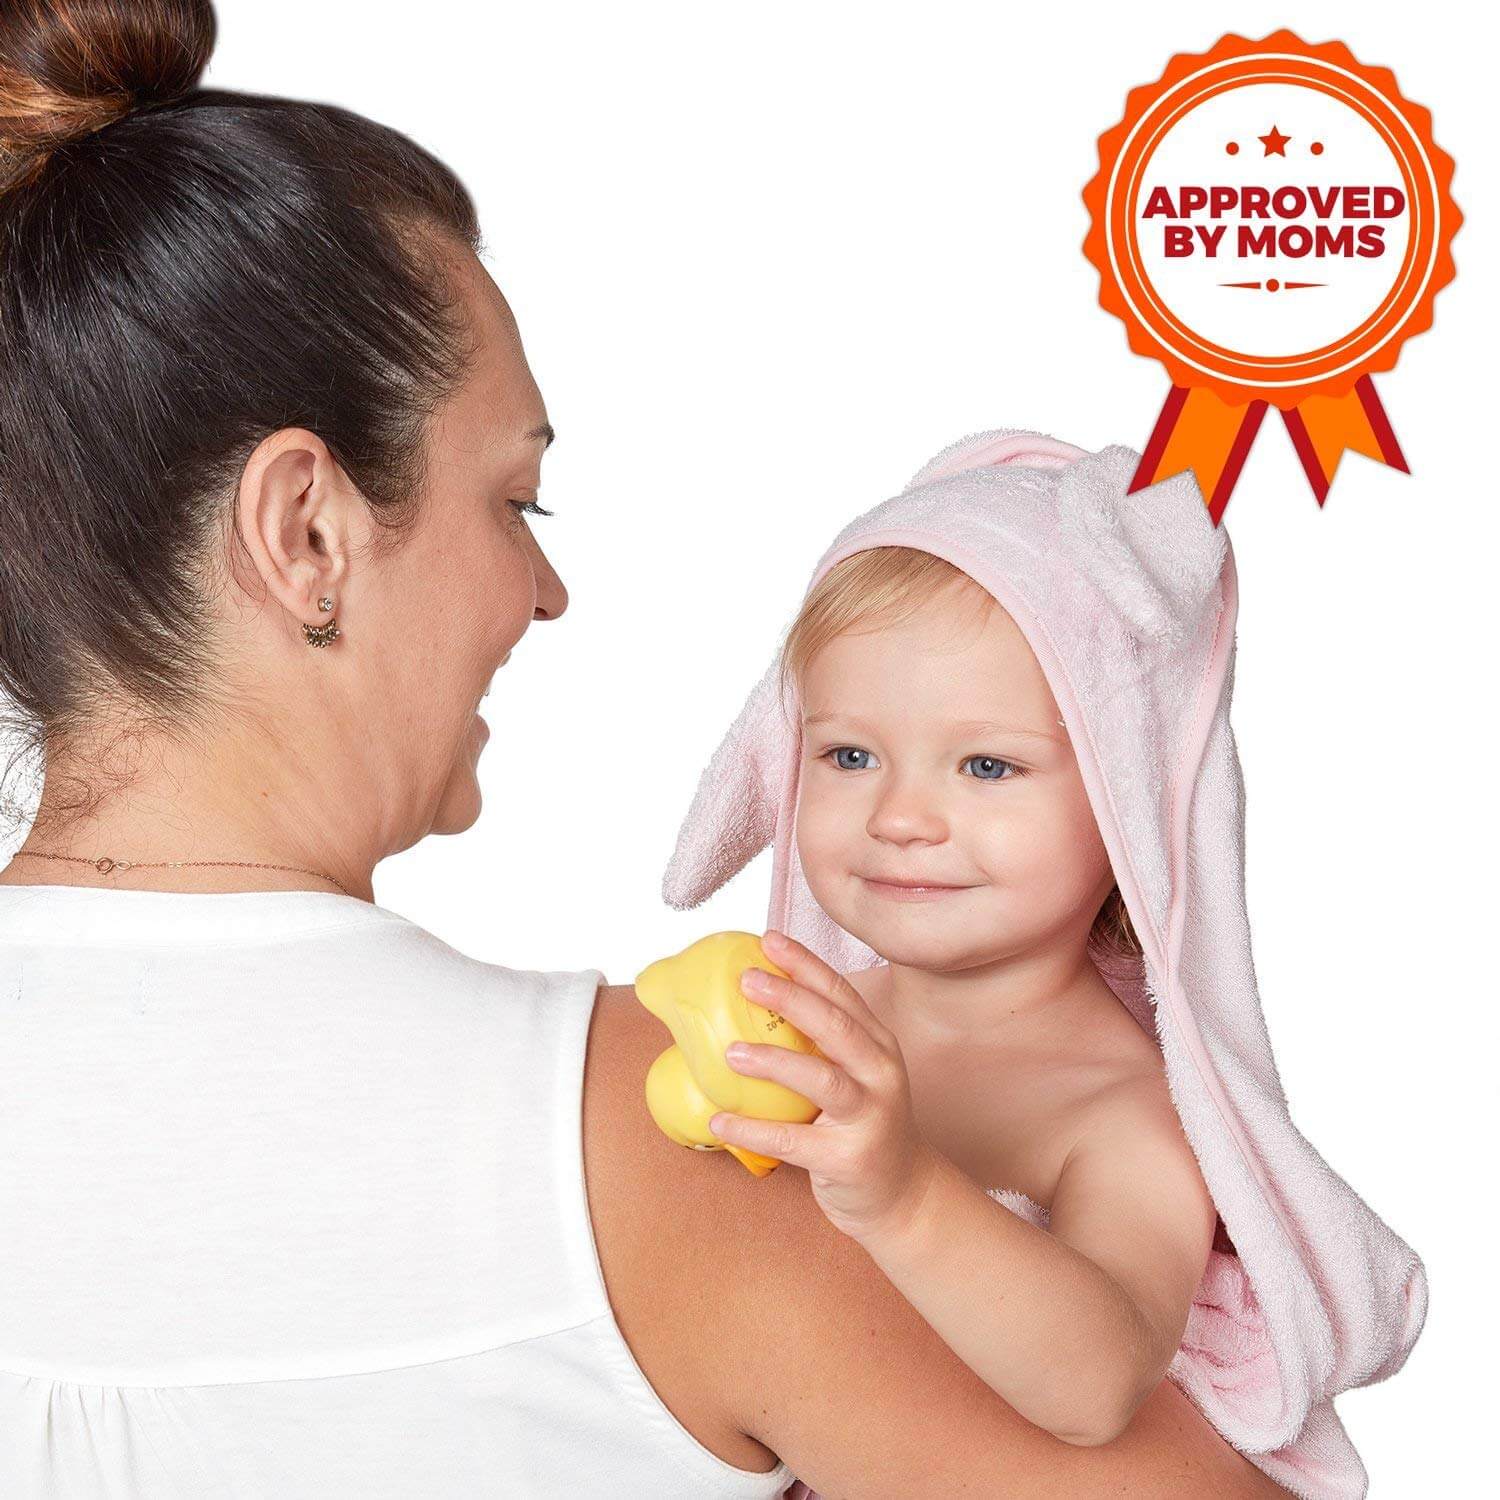
You got it! Moms. She’s happy that her kid’s wearing this hooded baby towel. The kid’s happy, mom’s happy. We even have a little approved by moms badge in the upper right corner.
Just be thinking about who can see themselves in the shoes of the person either using or wearing your product.
So to recap on your lifestyle photo shoot:
- Plan shots in advance
- Get a friend or family member who personifies your target market for the shoot
- Find a nice looking, relevant location – if inside, you’ll want lots of light
- If outside, try to shoot either early morning or late afternoon for best lighting
Infographic Image
Another type of image you can use is an infographic style image. Since this season is all about Customer Driven Innovation™, where we’re taking a product and improving upon it, then those are the key things we want to highlight in our product photos.
Here’s what we improved for our clamp-on keyboard tray:
- High-quality material – we are using bamboo for one variation and MDF for our second variation
- Comfort fitting wrist-rest
- Manageable size of the tray
- Clamp size adjusted so it sits higher and doesn’t hit knees
These are Lenny’s recommendation on photos we should take:
- Closeup of keyboard tray with text on the left or right saying “High-Quality Bamboo/MDF”
- Closeup of wrist-rest
- Wide shot with a person sitting at a desk with text saying “Perfect Size!”
- Closeup of the clamp, with someone sitting. Text: “Clamp doesn’t hit your knees!”
OR comparison shot of ours vs. theirs.
Here are a couple of examples of an infographic image:
Packaging Image
Lastly, the other type of photo you can include is a packaging shot. Especially if your packaging is customized, it’s just a cool chance to show it off and it also has an effect on the perceived value of your brand.
Editing Your Photos
Editing is often the scariest part to most people. Of course, if you know how to use Adobe Photoshop or Lightroom, then that’s great. But you can get similar results by using mobile apps like Instasize or photo editing built into your phone. You can also use a basic online editor such as Gimp. Check out this great post on DIY product photography which covers basic editing using an iPhone.
Working with a Professional
When outsourcing to a photographer, doing your research and sending a strong brief is the most important thing you can do, in order to get the most out of your investment.
You should:
- Give as much information as possible
- Give a full and detailed explanation for EACH individual image you require
Especially since many will charge you per photo, you really want to make sure they shoot it correctly. If you miss any details, and then the results are unsatisfactory, the photographer will likely expect you to pay extra to do the whole shoot again.
What To Include
As a rule of thumb, you should submit the following as a broad brief:
- Product Name and Description – Give them a good idea of what the product is all about
- Contact Details
- Brief Overview – Just a few sentences will do at this point, go into detail later
- Number of Photographs Required – This is especially important if you are looking for a quote
- Type of Photographs Required – Do you require studio photos on white backgrounds? Lifestyle images? Both?
- Models Required?
- Size of Product – Particularly if it is large, let them know
- Technical Requirements – Full high-resolution images, RGB color mode, JPG and/or TIF files
- Cropping (i.e. square cropped ready for Amazon, or would you like them un-cropped and do this yourself?)
- File Names – If you are ordering a lot of photos, it’s useful to specify how you would like them to be named, saves you a job and the photographer can quickly export them with the correct naming conventions
- Product Delivery – Let them know how and when you can deliver samples
- Deadline – Very important for you, especially when finding out which photographer will be the best fit for your schedule
Then you should go into detail for each image with the following types of information:
- Type of image – Really explain what each photo needs to look like. Well-lit on a white background? Studio-lit on a different color background? Outdoors on location? Indoors on location?
- Positioning / Angle – Explain how you would like the product to appear in the image. What angle? Close-ups? On its side? If it helps, provide a rough sketch
- Product Details – Do you need any product details to be included or on show? Think about logos, packaging, specific features
Need an Amazon Product Photographer?
Get access to the best Amazon photographers all in one place!
With the Jungle Market, you won’t have to browse through thousands of unqualified freelancers. The Jungle Marketplace offers only verified pros that have been fully vetted by the Jungle Scout team.

Conclusion
Ultimately, you need one really good main image photo, to get people to your listing. You can have up to nine photos on your listing. We recommend that eventually, you aim to fill up all those slots. The more photos you have, the more opportunities you have to sell your product to a customer.
You can edit your listings as many times as you want for as long as you want. Don’t feel like the first time you create your listing, that everything needs to be there.
A few good images, that’s a perfectly fine start and you can always add more down the road so don’t stress out about that.
The most important thing, throughout The Million Dollar Case Study, is just getting started and taking those next steps. We can always optimize things down the road.
Now it’s YOUR TURN!
Start selling on Amazon today
Your Amazon success starts with Jungle Scout.
Start doing some research of your own! With every blog post, we’ll be challenging you with “Action Items” to make the most of your MDCS journey.
This weeks Action Items can be found here, in your FREE MDCS Workbook!
After you’ve completed your Action Items, post your progress to the Million Dollar Case Study Facebook Group! You don’t have to reveal all of your best ideas – just let us know you’re working on them! You can also post them to Instagram with the hashtags #mdcschallenge or #freedombuilders.
We donate 100% of our product proceeds to Pencils of Promise.
They build schools in developing countries to help children get access to the education they need for a strong foundation.
We love doing the Million Dollar Case Study. It’s a team-wide effort and we value every opportunity it gives us to connect with sellers like you.
Missed an episode? See them all here.
3 comments on “Million Dollar Case Study: Product & Lifestyle Photography”